Fixing up the hammock
In a world where we're supposed to think about the environment. There still aren't sold spare parts, for a lot of things. Hammocks/swings or what they're called in Sweden is one of those things.
But I refuse to buy a new one, just because the roof was damaged.

So my father replaced the part of the frame, that was broken.

My brother 3D printed a new screw.

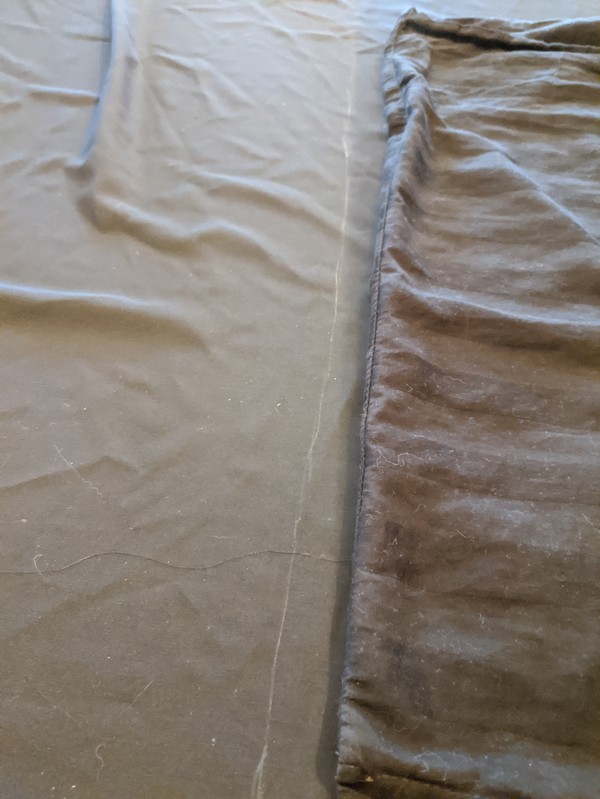
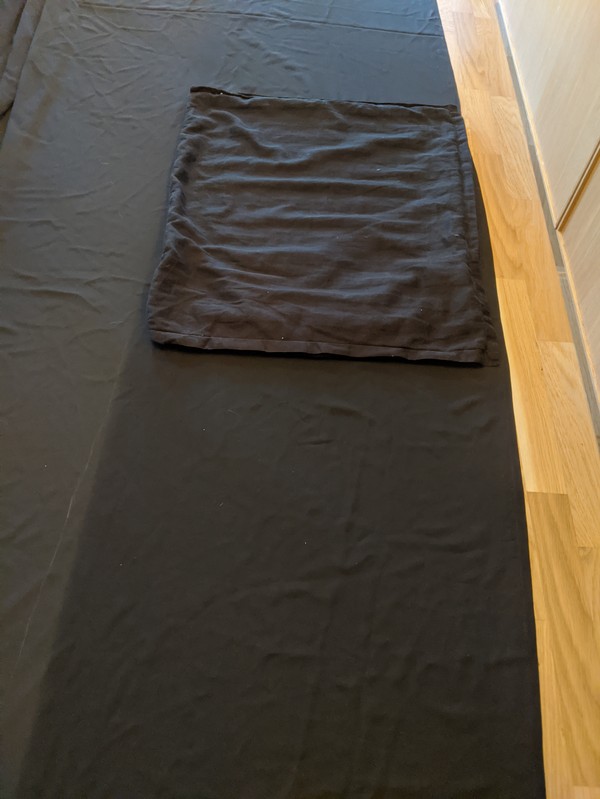
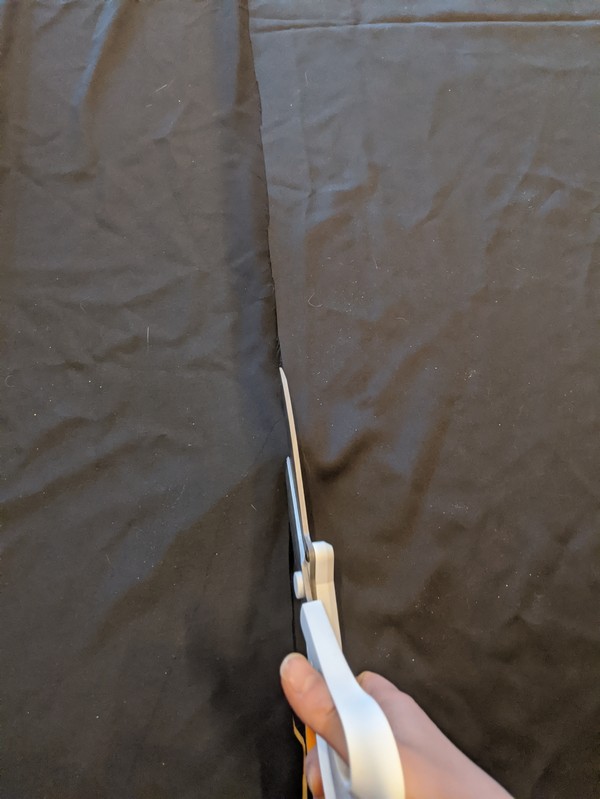
Using the old fabric, that had lost it's color and had huge holes, I cut out a new roof. Made from thicker and rainproof cotton canvas.

The old fabric, was once black...

Of course I had cat help.


Then I just had to add some velcro straps to the shorter sides.

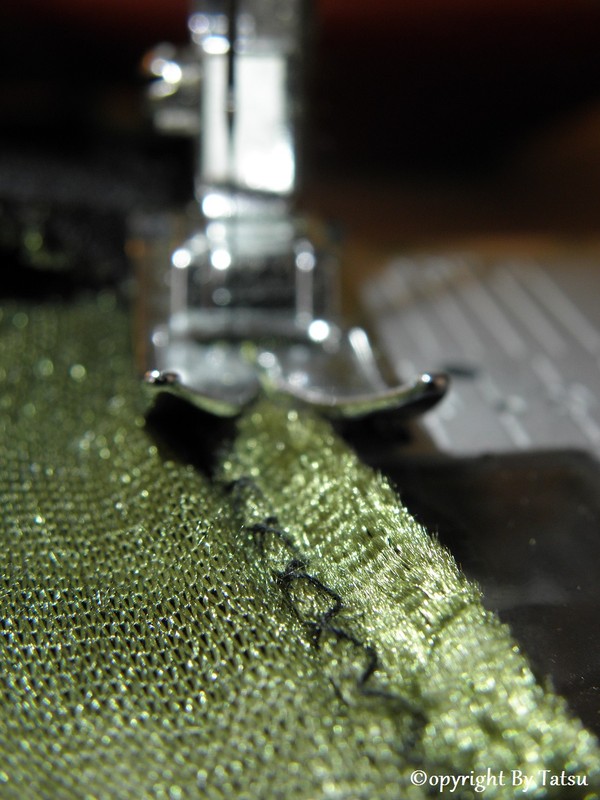
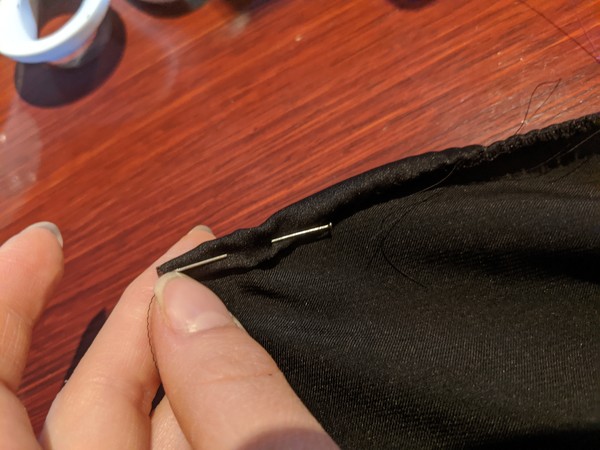
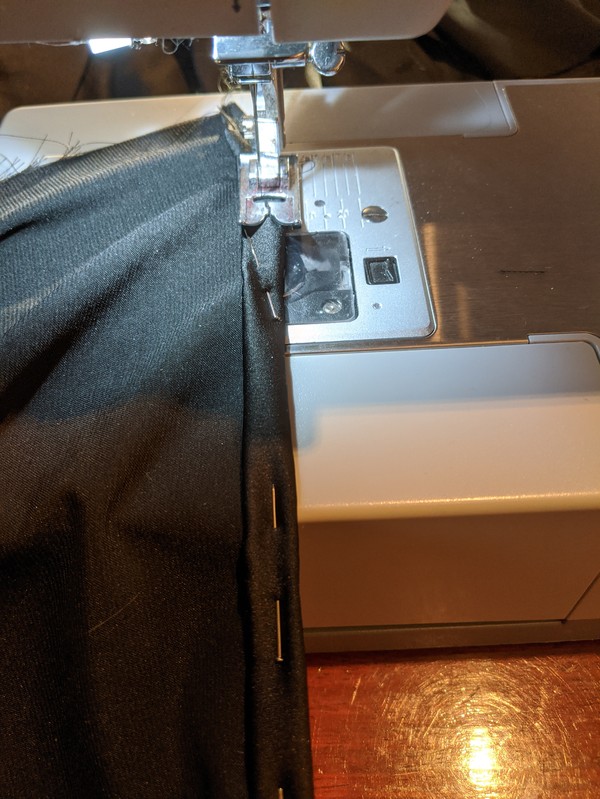
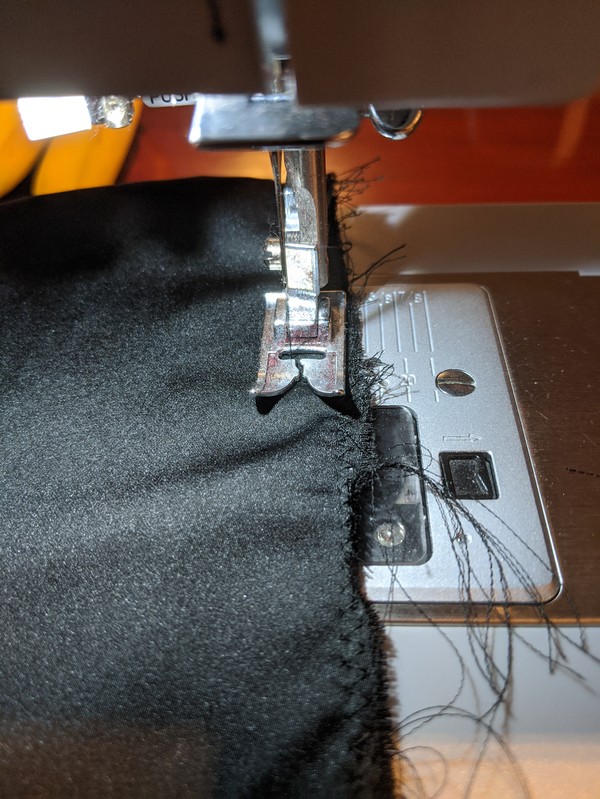
I rain proofed the seems.

And done!
I'll put out the cushions too as soon as the seat is dry. Then some happy cats can take naps there and if the cat's allows it, we can also sit there.
Oh and my father had me ordering fabric as soon as he heard, I was sewing a new roof. He wants one for his hammock too. So I now have his roof frame in my hallway.
Medieval fair my dress

I made this dress in 2017. This is what it looked like before I updated it this last week...

This is what it looks like now! I've altered the sleeves, added a ribbon and front lacing. It's as if those things finally made the dress into what it's supposed to look like!


DIY - Skirt
Translating my old tutorial to English.
You need:
- Two fabrics of different colours/material. (It's easier to not use a stretchy fabric, if you're a beginner)
- Thread
- Scissor
- Sewing machine
- Elastic
- Safety pin
- Scissor
- Something to measure with
- Possibly needles/pins
Skills that you need:
- Basic sewing
- Basic mathematic
Step one:
- Chose two fabrics and calculate your measurements. Measure waist/hips (+ extra space to get it on), length and the width that you want at the bottom. + space for the seems. But this you can add in the next step.
- Decidehow many stripes that you want. I chose five green and five black. Mpre stripes=smaller stripes.
- Now you need to calculate how big you want each piece. Waist measure/each stripe + 2 cm extra for each peiece. Same thiong at the bottom. Mine were 12 cm at the top and 12 at the bottom.

- Draw a line at the bottom. Draw a dot at the bottom and measure the length. Draw a dot in the middle at the top and draw a line.
- Draw a line for the top left corner, to the bottom left corner. And the same thing on the other side.
- Cut out the piece.
- Use it to cut out the rest of the pieces from both fabrics.
- If you use a stretchy fabric. Don't pull at it, since that will cause the edges to curl. It will make it harder, but not impossible to handle.

Time to sew!
- Put two pieces of different fabrics together. The outside against the outside, so that you have the inside visible. The narrow part against the narrow part, as this is the the top fo your skirt. It might be easier if you pin the fabric together, but I didn't.
- Zigzag the two pieces together, always starting from the top. Continue to add pieces and sew them together.

- Don't worry if your bottom looks like this. You can just cut this away once you're done zigzaging.
- Cut away excess fabric at the bottom, but watch out for the seams! If it's still a bit uneven, that's alright. No one will be able to see it once you're done.

- Put a straight seem inside the zigzag. Around 1 cm.

- Make room for your skirt to go around.

- Time to zigzag the top part.

- Fold all of tese parts in the same direction. I folded all against the green fabric, but you can chose to fold all against the left or right. Just make sure to do the same thing at the bottom later.
- Fold the edge a bit and sew a straight seam. Thise will hide the zigzag seem, once you sew in the next seam for the elastic.

- Fold to make space for the elastic. I pinned, but gave up and removed them and just made it at "free hand", as I always do...
- Sew a straight seam (around where you put the first seam). Leave a few cm, to put the elastic through.
- Cut out a piece of elastic. A bit shorter than your measurements, because it's elastic.
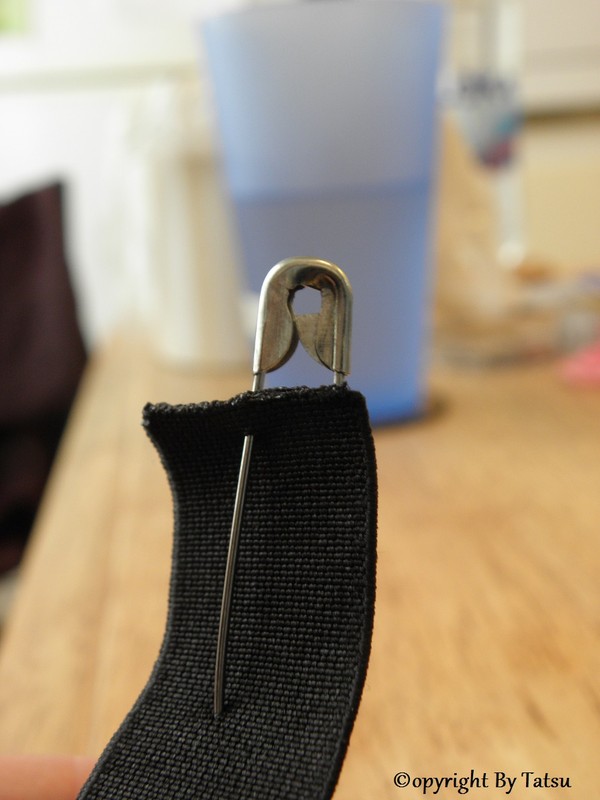
- Put a safety pin on it. Not like in my picture but at the edge.
- Pull it through and make sure that it doesn't twist.

- Sew the ends of the elastic together. Preferably with two or a few straight seams.
- Make sure to test the skirt, in case you need to adjust the length of the elastic!
- Sew the opening that you left for the elastic, shut.
- Zigzag the bottom and make sure to fold the overlappings in the same direction as you did at the top.
- Fold the fabric and sew a straight seem as you did on the top.
- Now it's time to try on the skirt, to adjust the length. It's easiest to pin it, but I didn't.
- Sew your last seam at the bottom.

If you want you can add pockets. Otherwose you're done now!
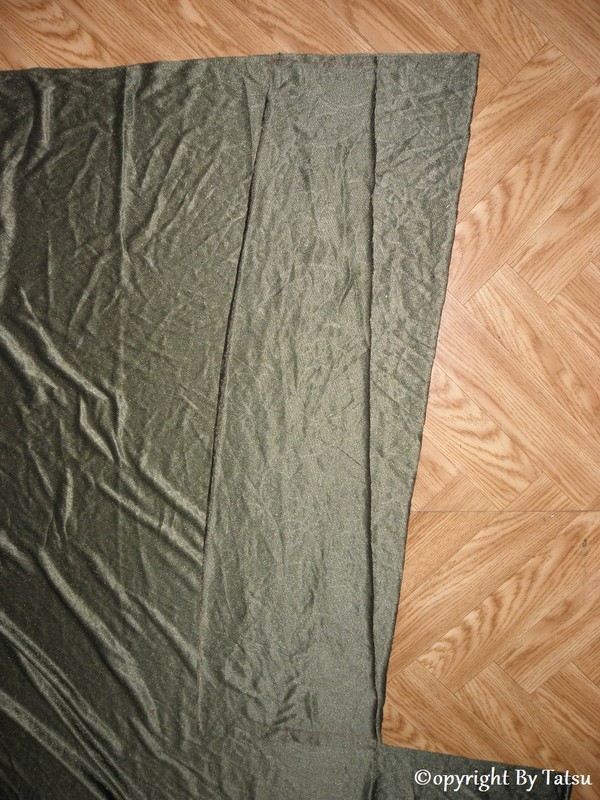
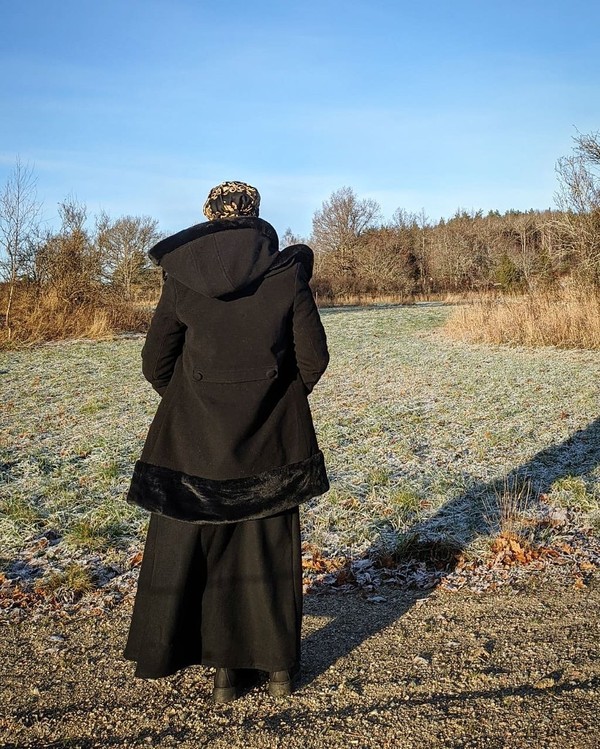
I made a winter skirt
Quite some time ago, I bought a wool mix fabric. I wanted to make a warm skirt.
I wanted it to be comfortable, have pockets, be wide enough to take full steps in and to be able to wear layers of skirts underneath if it's really cold.
Yesterday I finally made it! As usual I didn't use a pattern. But I made sure to measure the size of the pockets so that my phone would fit.

It took me 2,5 hours to make and that includes feeding the cats and ducks.
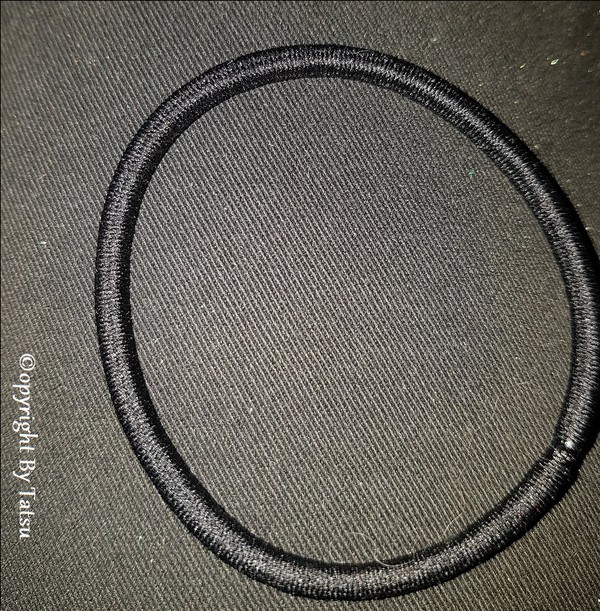
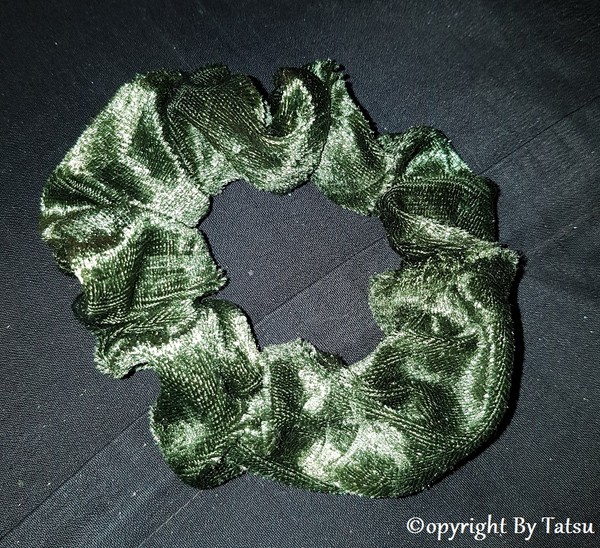
I also made a scrunchie!

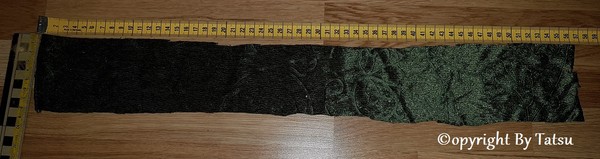
I got this little piece of fabric (and a bigger piece) left. From korps.se

So obviously I needed a scrunchie!


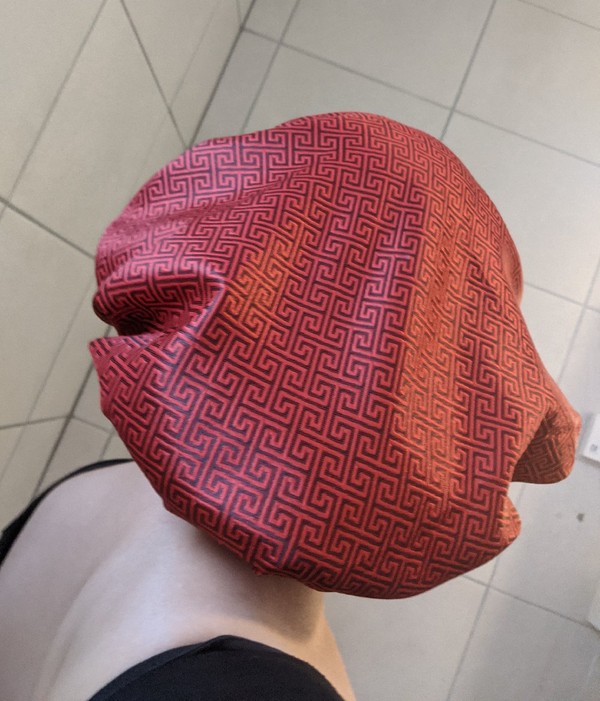
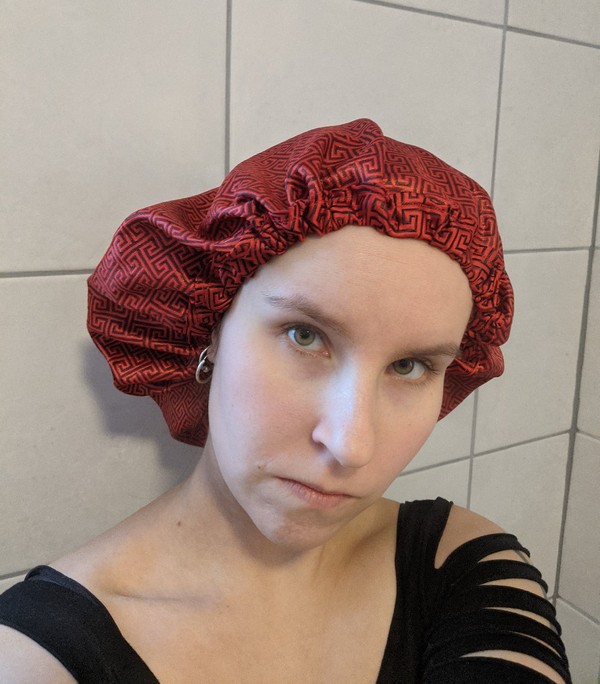
New sleeping cap/nightcap!

I made this from an amazing silk fabric from korps.se

The prettiest side, that you can see here, is actually the inside of my cap, since it's the smoothest.

DIY - make your own nightcap/sleeping cap
You will need:
- A fabric of your choosing. Preferably some sort of smooth satin, such as silk satin or rayon satin.
- Thread
- Elastic or a draw string
- Safety pin
- Sewing machine
- Pencil
- Pattern or a string and needle
How to do it:
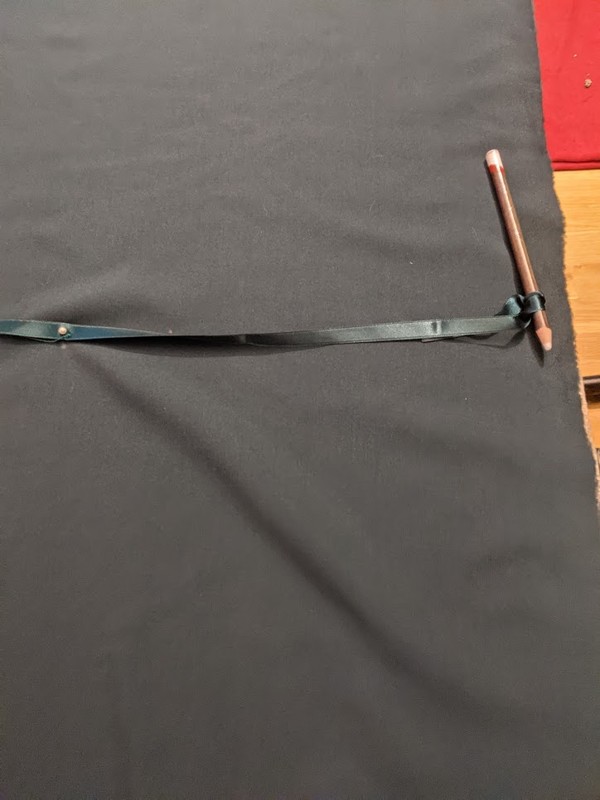
- Draw a circle.
- I put the fabric on a soft surface. I choose the couch, but a bed should be just fine. I took a ribbon and attached it with a needle in the middle.
- Then I measured 30 cm from the needle, to where I attached the pen with a knot.
- I held the needle down with one hand and used the other to draw the circle. (I actually got a bit of help from my boyfriend, to keep the fabric smooth, but you can do it by yourself.)

- Your circle doesn't have to be perfect.
- Zigzag all the way around the fabric.

- Fold the edge and sew running stiches all the way around.
- If like me, you have a fabric with a smoother side. You want the smooth side to be the inside of your cap, to protect your hair.
- To make it more comfortable, I put the "pocket" for the elastic on the outside of the cap.

- Fold the fabric again to make a "pocket" for the elastic and sew another running seam. I folded the fabric every few centimeters, to make wrinkles as I went, because it's a circle and you will end up with a longer piece of fabric on the edge. You can of course pin it before you sew it, but I prefer to just do things as I go. (Lazy Tatsu.)
- While you can place this "pocket" on the inside, I highly doubt that it will be comfortable. So once again I placed it on the outside.
- Leave a 2-4 cm opening.

- Attach your elastic or draw string to a safety pin and pull it through your pocket. You can measure the length before or after.

- Sew the ends of the elastic together.
- If you're unsure that the elastic is a good length for you. Leave the opening. If not, sew it close.

- If you want to decorate your cap, you can attach a bow to it.

And I am about to make more! I want thinner silk ones for the summer and another one in black rayon satin to match our other pillowcases.
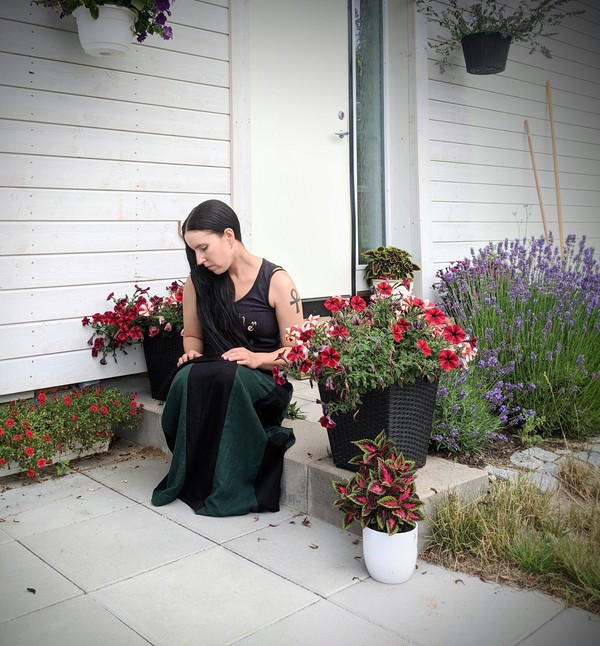
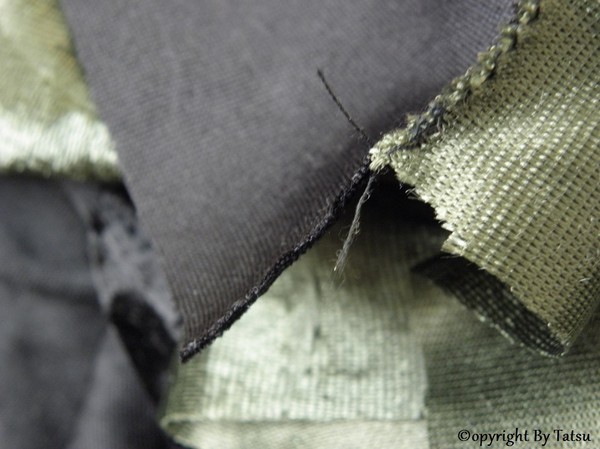
I made another skirt
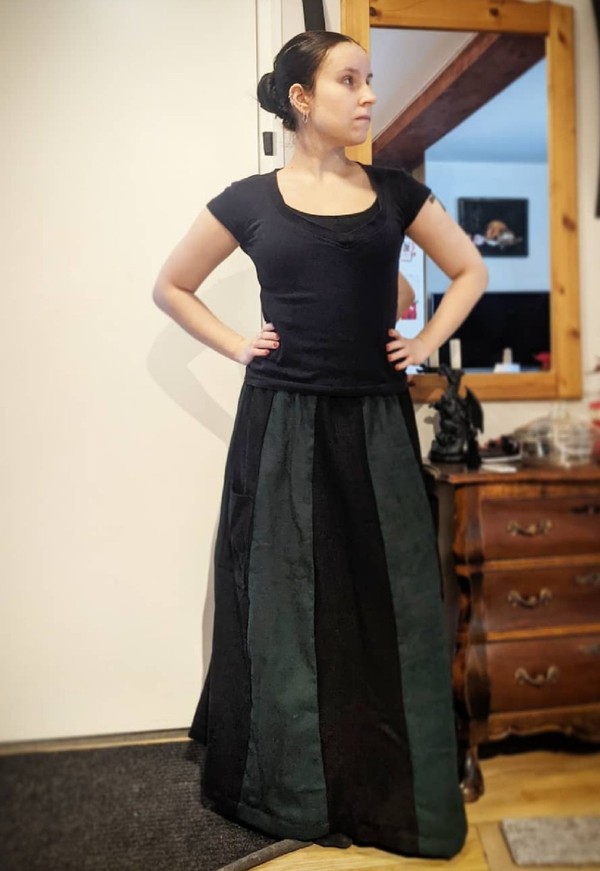
I'm actually proud, that it only took me 5,5 hours to make it!

Years ago I made one in velvet from my own pattern. And I've wanted to make another one, in the same colours, but from linen fabric. Finally found nice fabrics this summer and now it's done!


Pockets!
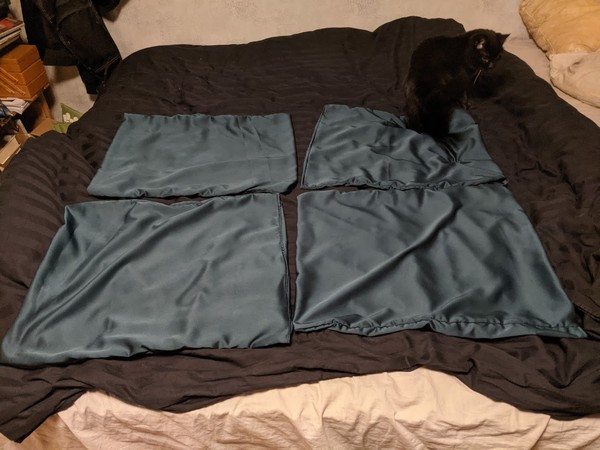
New pillowcases
I made some more hair friendly pillowcases today. This time in green.

I have a post with instructions if you want to try it! It's easy and fun!

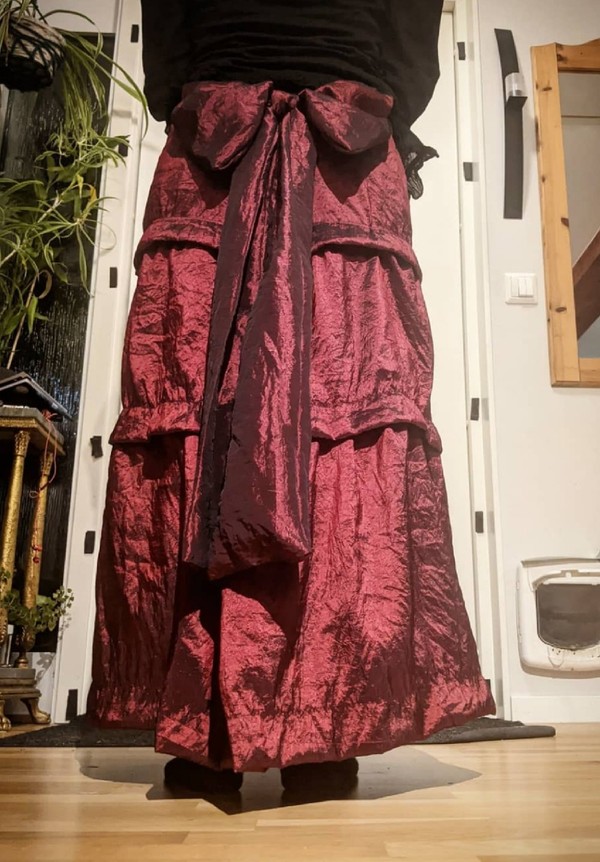
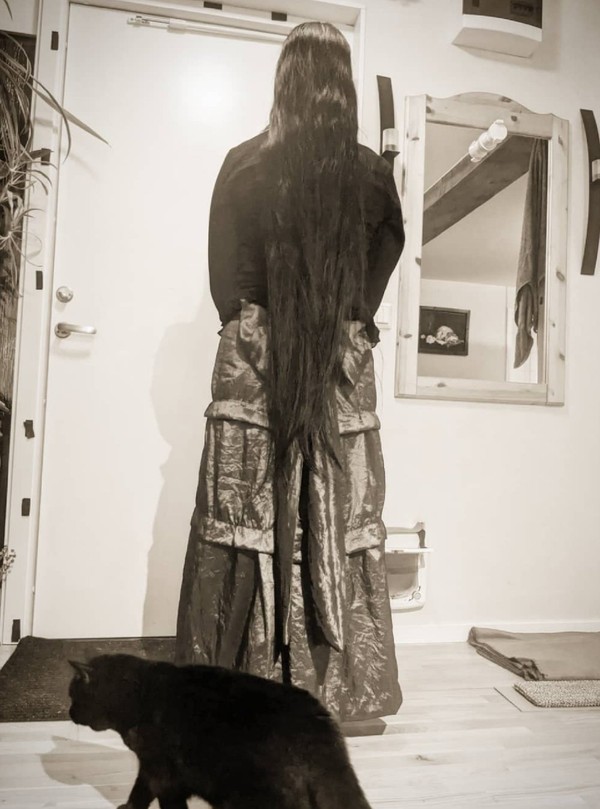
I made a new skirt!
After many hours of sewing, I'm finally done!

It was a lot of work, but I am very happy with it!


DIY. Make your own hair friendly pillowcase
Silk and polyester satin pillowcases are a lot kinder to the hair than cotton, but they can be expensive and hard to find. Luckily it's not hard to make your own!
You need:
- Fabric in silk, polyester satin or some other slippery material
- Scissor
- Pen
- Needles
- Thread
- Sewing machine
- An old pillowcase
How to do it:

- Put an old pillowcase in the right size, on the fabric.
- Draw a line two cm outside the longer edge of the pillowcase.
- It's not the end of the world if the line isn't perfectly straight. As you can see, mine isn't.
- Put the pillowcase on top of where you just had it and continue your line.

- Add 20 cm for the pocket.
- Cut out the fabric.
- If you're making more than one pillowcase, just place the piece you just cut out, on top of the fabric and cut after it.

- Zigzag the shorter edges.
- Fold the shorter edges twice and pin them as seen in the picture.
- Sew a straight seem. (Both shorter edges)
- If this feels hard, you can fold once, pin, sew, fold again, pin and sew, instead of folding twice at once.

- Line your fabric up with the old pillowcase.
- Fold it inside out, so that the top part and the fold is even with the pillowcase.

- Put the fabric on top of the old pillowcase.
- Align the fabric with the pillowcase and make sure that it's "folded, inside out".
- Fold the remaining fabric as seen in the picture.
- Pin it, so that the top edges are perfectly aligned and the longer edges are "aligned enough".

- Zigzag along the longer edges.
- Sew a straight seam around 1 cm inside the zigzag seam.

- Turn the pillowcase so that the outside is now outside.
- Now you have one or several hair friendly pillowcases!
- Go to sleep and enjoy waking up with less tangles and friction damage in your hair!
DIY. Make your own scrunchie
You need
- Fabric - preferable is velvet, silk or satin
- Elastic
- Scissor
- Thread
- Needle
- If wanted, a sewingmachine
How to do it
- Cut out the fabric. Mine's 56x9 cm.
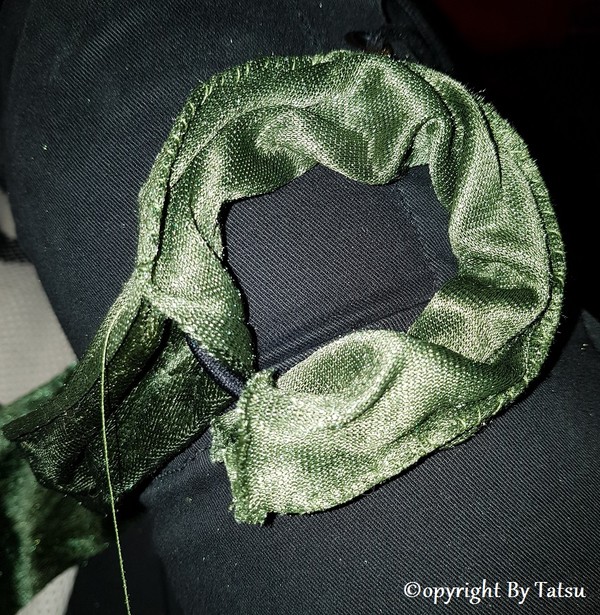
- Put the fabric inside out.
- Sew the longer sides together, around the elastic. I did it by hand, but you could do it with a sewing machine.

- Turn the fabric the right way by "pulling it trough itself"

- Take a needle and thread.
- Make a knot and start your sewing with the knot inside the fabric.

- Fold the edges as in the picture and sew "around" them
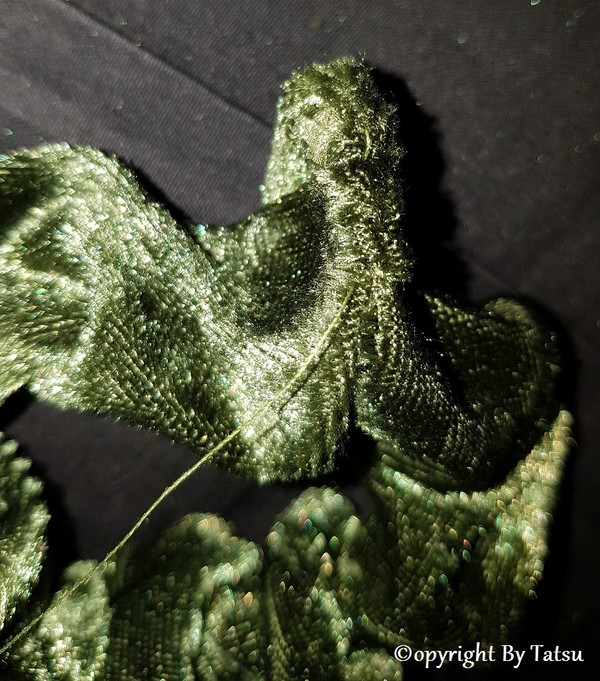
- This will give you and "invisible" seam. But it's not the end of the world if your seams are visible.
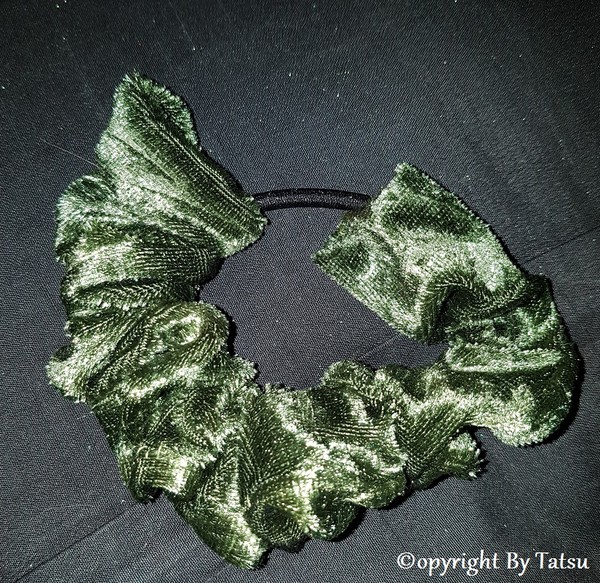
- And now you have a scrunchie!

I made scrunchies

While rewatching a movie I made my first scruchies.
I made them by hand and used leftover fabric from the skirt I made a few years ago. So they match!

A tutorial on how to make your own scruchies will be up in the next couple of days!
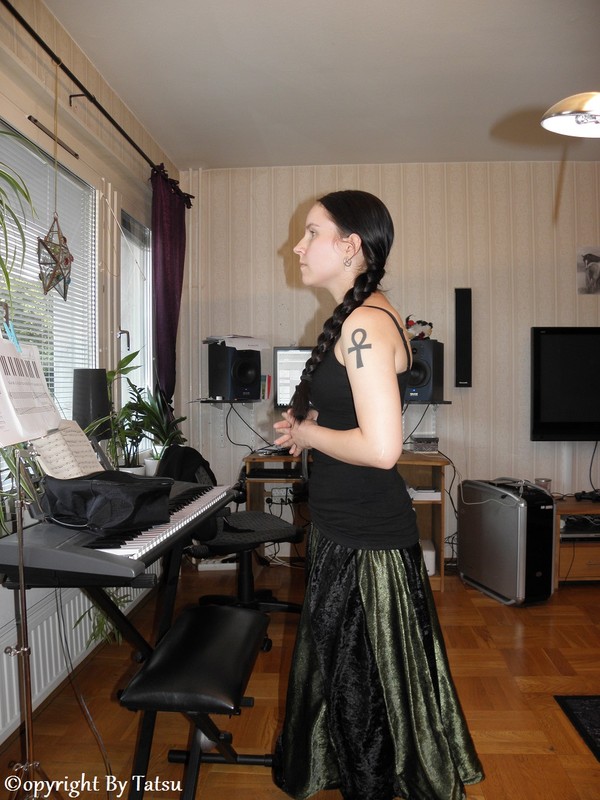
Dress and bag

This is the dress that I made for comic con. (Of course I'll use it more than just for CC)
Det här är klänningen som jag sydde för comic con. (Självklart så kommer jag att använda den mer än bara till CC)

As usual I didn't really make or follow a pattern. I drew a sketch and measured a bit. The rest I made up and adjusted along the way. The design is what I had in mind though.
At first I planned to make it simple with just one layer of fabric. Then I thought that I wanted it more sturdy and a bit warmer, so I cut out a second layer of fabric.
Som vanligt så varken gjorde eller följde jag något riktigt mönster. Jag ritade upp en skiss och mätte lite. Resten hittade jag på och ändrade efter hand. Designen är dock vad jag hade planerat.
Först så planerade jag att göra det enkelt med bara ett lager tyg. Sedan så tänkte jag att jag villa ha den stabilare och lite varmare, så jag klippte ut ett till lager med tyg.

And then it happened to be, that my boyfriend changed the string on the bass and I thought "Hey! These will be good to put in the top half of the dress to make it more sturdy".
Och sedan var det så att min sambo bytte strängar på basen och jag tänkte "Tjo! Dessa blir bra att sätta i överdeled på klänningen för att göra den stabilare".

Said and done! I cut the strings to good lenghts and used a glue gun to keep the ends together and to make them less sharp.
Sagt och gjort! Jag kapade av strängarna till bra längder och använde en limpistol för att hålla ihop ändarna och göra dem mindre vassa.
I made litte "bags" for them and hand stiched them in the middle.
Jag gjorde små "påsar" åt dem och handsydde fast dem i mitten.

I put two strings in the front (where the red meets the the black). Two in the sides (one on each side) and two in the back.
Jag satte två strängar fram (där det röda möter det svarta). Två på sidorna (en på varje sida) och två bak.
For the sleeves I used the same fabrich for the inside as I did for the front of the dress. I think that it adds a nich touch to it and I also ran out of black fabric.
För ärmarnas insida så använde jag samma tyg som för framsidan på klänningen. Jag tycker att det ser lite intessantare ut så och så fick jag slut på svart tyg.

I planned to use a lot of time to make the dress and ended up taking around ten times as much time... But it was worth it! I'm actually happy with it and a nice surprise was, that because of the double layer of fabric, it kept a nice round shape at the bottom without any under skirts.
Jag räknade med att det skulle ta mycket tid att göra klänningen och det slutade med att det tog ungefär tio gånger så mycket tid... Men det var värt det! Jag är faktiskt nöjd med den och en trevlig överraskning var att tack vare det dubbla tyglagret, så höll den en bra rund form i botten utan några underkjolar.

In 2015 I made this bag http://tatsu.blogg.se/2015/march/diy-sy-en-axelremsvaska-2.html#comment
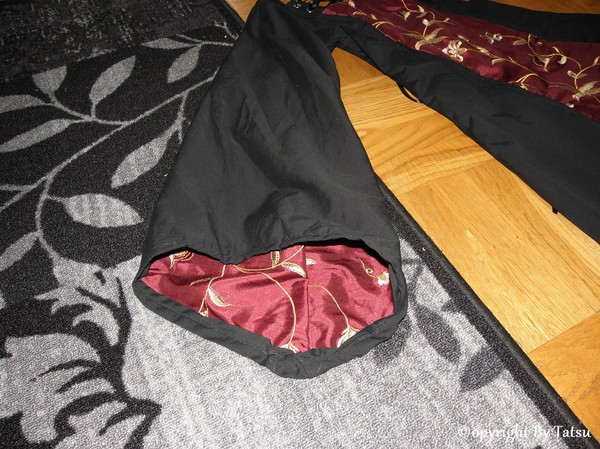
As a combination of beeing lazy and in a hurry I let the inside be jeans fabric and I made no pockets in it.
2015 gjorde jag den här väskan http://tatsu.blogg.se/2015/march/diy-sy-en-axelremsvaska-2.html#comment
Som en kombination av lathet och att ha haft bråttom så lät jag insidan vara i jeanstyg och gjorde inga fack i den.

To make it look better, match my dress a be bit more and be more practical, I added in another layer of fabric. So now the inside is black. I also made pockets. One I made just to fit my comb. I found that I still had a few of the same buttons, that I put on the bag in 2015. So I used two on the inside.
För att få den att se bättre ut, matcha min klänning lite mer och vara mer praktisk, så la jag ett till lager med tyg. Så nu är insidan svart. Jag gjorde också fack. Ett gjorde jag bara för att få plats med min kam. Jag upptäckte att jag fortfarande hade samma knappar, som jag satte på väskan 2015. Så jag satte två på insidan.
Comic Con!
So as usual I ended up not taking that many pictures, but I'll upload the ones that I did take.
Som vanligt så tog jag inte så många bilder, men jag lägger upp dem jag tog.

On the train with this woman (http://finurlig.blogg.se/), who had slept for 45 minutes. And I thought that I got done with my sewing during the last minute!
På tåget med den här kvinnan (http://finurlig.blogg.se/), som hade sovit i 45 minuter. Och jag tyckte att jag blev klar i sista minuten med att sy!


At the trainstation we had some Starbucks while Penna braided Puccas hair.
På tågstationen drack vi lite Starbucks medans Penna flätade Puccas hår.

I was the one who had promised to braid Puccas hair, but since Penna is the braid master and I failed at hiding the paranda knot, I forced her to do it. I'm a mean person!
Egentligen så var det jag som hade lovat att fläta Pucca hår, men eftersom att Penna är flätmästaren och jag misslyckades med att gömma parandaknuten, så tvingade jag henne att göra det. Jag är en elak människa!


She likes pillows...
Hon gillar kuddar...

When you're too cheap to buy an autograph. Just stalk the celebrity from a distance... And for thoose of you who doesn't know who he is: go watch some Game of Thrones right now!
När du är för snål för att köpa en autograf. Förfölj känidisen på håll... Och för er som inte vet vem han är: gå genast och titta på lite Game of Thrones!


She loves her new bag.
Hon älskar sin nya väska.


After we where done, we went to find something to eat/drink and I actually found a smoothie that I could drink! It also tasted good!
Efter att vi var klara, så gick vi för att hitta någonting att äta/dricka och jag hittade faktiskt en smoothie som jag kunde dricka! Den smakade gott också!

I bought theese and had to try all of them at once... (They're actually letteropeners)
Jag köpte dessa och var tvungen att testa alla på en gång... (De är egentligen brevöppnare)

The dress I made. I'll make a separeate post about it.
Klänningen jag sydde. Jag kommer att göra ett separat inlägg om den.

Until we where heading back home, I wore my hair in a half up. Then I got tired of it and decided to use my new swords.
I'm actually surprised that my hair didn't become a tangly mess from beeing loose! Sure, I combed it a little bit during the day, but just a few years ago it still would have tanlged in less than an hour. It means that my hair is in much better condition now!
Tills dess att vi skulle tillbaka hem, så hade jag mitt hår i en half up. Sen tröttnade jag och bestämde mig för att använda mina nya svärd.
Jag är faktiskt förvånad över att mitt hår inte blev en tovig röra från att vara utsläppt! Visst, jag kammade det lite under dagen, men för bara några år sedan så hade det fortdarande blivt tovigt på mindre än en timma. Det innebär att mitt hår är i mycket bättre skick nu!


I ended up only buying books and my swords. I was very happy to find some Trinity Blood! Later I saw that I didn't get 11 (they didn't have it). So now I have to find it and the last books. They are no longer sold in Sweden and this is one of my favorite series, that I've wanted to know how it ends, ever since I first saw the anime ten years ago...
Det slutade med att jag bara köpte böcker och mina svärd. Jag var väldigt lycklig över att hitta lite Trinity Blood! Senare upptäckte jag att jag inte fick 11:an (de sålde inte den). Så nu måste jag hitta den och dem sista böckerna. De säljs inte längre i Sverige och det här är en utav mina favoritserier, som jag har velat veta hur det slutar, ända sedan jag först såg animen för tio år sedan...

I had a great time and enjoyed some great company! I'm defenitely going next year again and might actually take some pictures of the con. Might...
Jag hade en jättetrevlig dag och fantastiskt sällskap. Jag ska definitivt dit nästa år igen och kanske till och med tar bilder på eventet. Kanske...
Bloomers

Dagens syprojekt! Ett par bloomers!
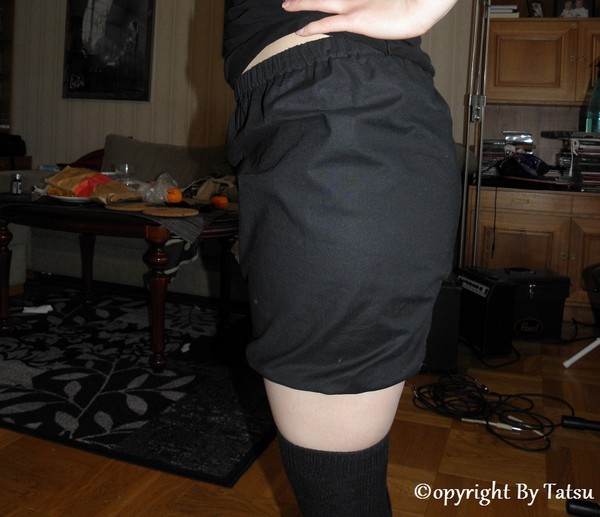
Som vanligt så har jag inte använt mig utav något mösnter utan bara sytt och klippt på fri hand utan att ha någon som helst idé om hur man "ska" göra.
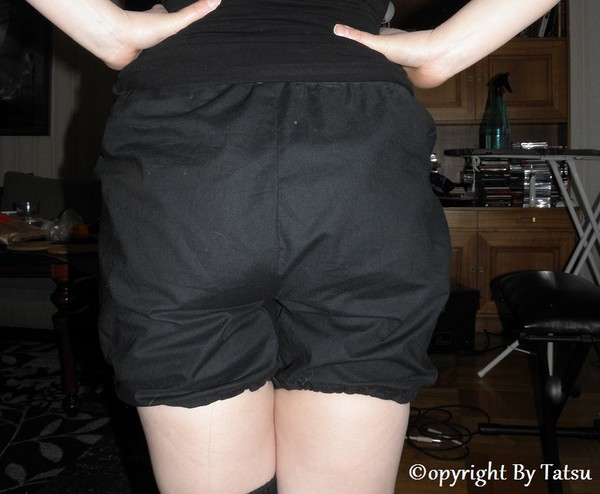
Det gick faktiskt snabbt och smidigt att sy dessa!
De är inte på något sätt gjorda för att vara snygga, utan för att vara varma och skyddande under kjolar och klänningar. Framförallt som på bilden, under kortare lolitaklänningar.
Om jag får tag i strumpeband/strumpebandshållare eller vad själva hållarna nu heter, så kan det bli så att jag syr fast hållare för dessa då jag är trött på att ständigt dra upp strumporna...
Så nu har ni fått se mina underbyxor! Ojojoj, tur att vi inte lever på 1800-talet! Då hade det varit riktigt oanständigt! Hahaha.
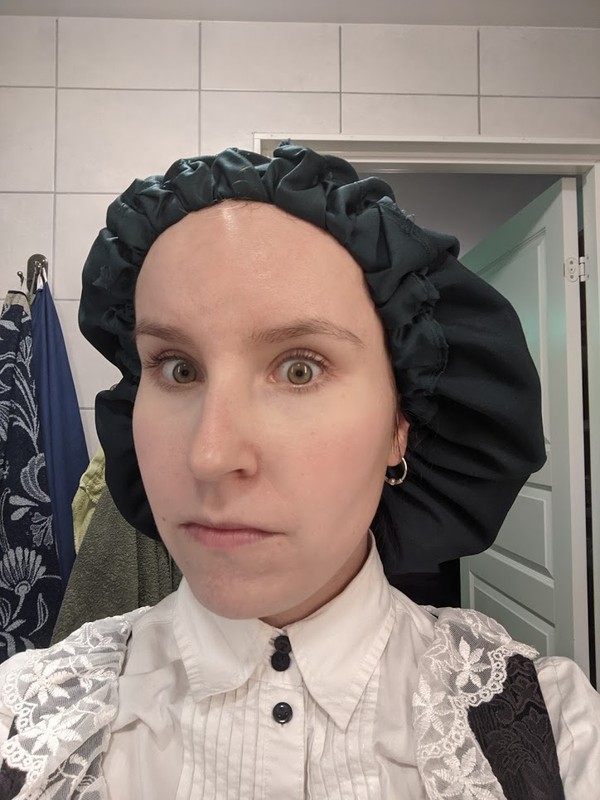
"Hårsäkrade" mössor
Nu börjar det bli kallt ute och mössäsongen har startat. Detta brukar för mig leda till torrare, trassligare hår och mer babyfjun. I år har jag säkrat mina mössor för att minska slitaget!
Ett extra plus är att mössan också blir lite varmare!

(Vänster: min vanliga mössa. Höger: min stallmössa.)
Jag ar tagit satintyg som jag har sytt innerfoder av.
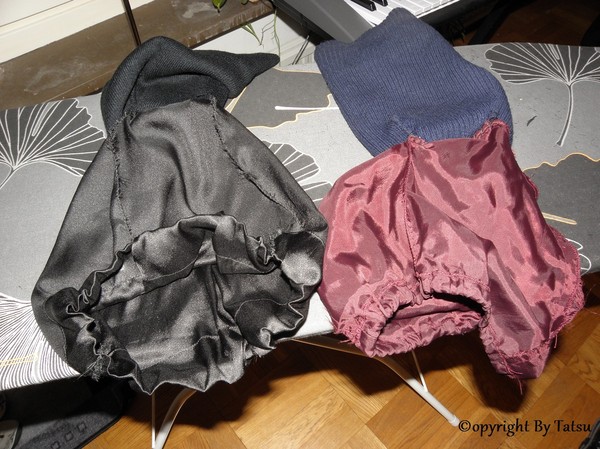
Jag har valt att bara sy fast fodret i toppen utav mössan.

Istället för ständigt gnidadande mot håret utav stickat material så är det nu endast satin som kommer i kontakt med håret. (Ignorera utstickande babyfjun)

Utifrån så ser man bara en helt vanlig mössa.
DIY. Sy en randig kjol

Du behöver:
- Två tyg i olika färg/material. Om du är nybörjare så är det enklast att börja med ett tyg som inte är töjbart.
- Tråd.
- Sax.
- Symaskin.
- Eventuellt nålar.
- Sprättare. Om du som jag syr fel ibland...
- Resårband.
- En penna.
- En säkerhetsnål.
Förkunskaper som krävs:
- Kunna sy rak och sicksacksöm.
- Kunna enklare matte.
Steg ett:
- Välj ut två tyger och räkna ut måtten. Bredd i midjan, bredd nedtill och längd. Lägg till sömsmån. Alltså den bit som försvinner i sömmarna.
- När du har de här måtten så är det dags att bestämma hur många ränder du vill ha. Jag valde fem i svart och fem i grönt. Ju fler du väljer, desto smalare blir ränderna.
- Nu ska du ränka ut måtten per bit. T ex så tror jag att jag gjorde mina 12 cm upptill och 22 nedtill. Då har jag räknat in två cm sömsmån.

- Rita upp och klipp ut första biten. Mät först längden och sätt en markering uppe och nere i tyget. Rita sedan ett streck upptill med det mått du vill ha. Utgå sedan från mitten nere och rita upp det mått du valt där. Dra sedan streck från överkant till nederkant och klipp.

- Nu behöver du inte mäta och rita mer. Lägg den utklippta biten på tygen och klipp därefter. Det blir spilltyg då du vill ha mönster/vävriktning i samma håll på alla bitar.
- När du har klippt ut alla bitar i första tyget så gör du samma sak med det andra.
- OBS! Tänk på att inte dra i tyget om du som jag har valt en stretchigt tyg, då det rullar ihop sig om man drar i det. Det är inte omöjligt, men blir svårare att sy i och hantera då.
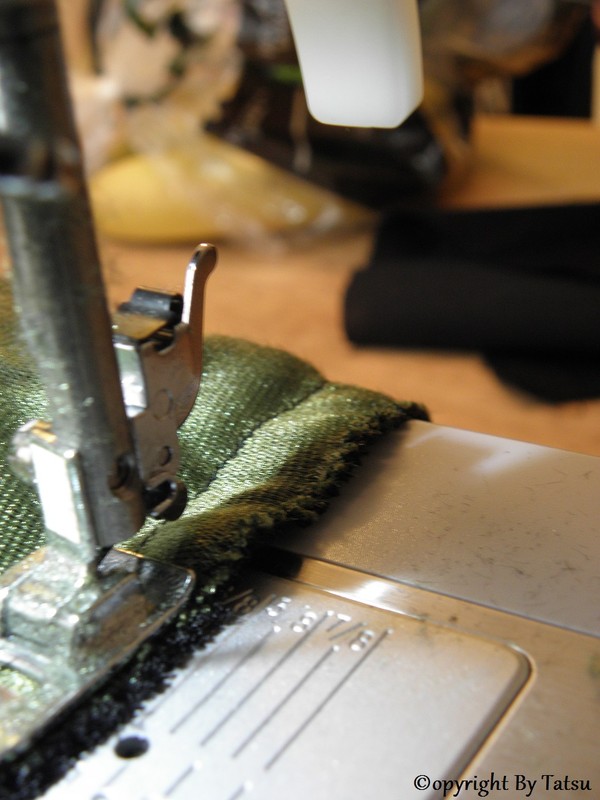
Nu är det dags att sy!
- Lägg en tygbit av varje färg med utsidan innåt mot varandra. Det enklaste här är antaglien att nåla ihop dem, men jag föredrar att sy på fri hand.
- Sicksacka ihop kanterna.
- Fortsätt på det här sättet. Utsida mot utsida, sicksacka ihop tills du har kommit till sista biten. Den sicksackar du ihop med den första så att du får en kjol.
- OBS! Var noga med att du har överdel mot överdel och nederkant mot nederkant. Alltså dem korta sidorna mot varandra och dem breda mot varandra.
- Det gör ingeting om det är lite ojämnt i nederkanten (Jag mätte och klippte inte så noga). Det är enkelt att fixa till när du har sicksackat ihop alla bitarna!

- Bara klipp bort dem bitar som är för långa. Se dock till att inte klippa i några sömmar. Är det några mm skillnad fortfarande så kommer det ändå inte att synas när kjolen är klar.

- Nu är det dags att sy ihop alla bitar med en raksöm.
- Eftersom att jag har räknat med två cm sömsmån på varje bit så syr jag raksömmen en cm från kanten. Då försvinner en cm på varje sida från varje bit.

- Dags att göra plats så att kjolen kan komma runt symaskinen.

- Dags att sicksacka runt överdelen på kjolen.

- Se till att vika dessa små kanter åt samma håll när du syr. Jag valde att vika in alla kanter mot det gröna tyget. Självklart kan du välja att vika alla kanter åt t ex höger.

- Vik nu in kanten en liten bit och sy en raksöm. Vi vill nämligen inte att sicksaksömen ska synas eller kännas i den färdiga kjolen.
- Vik nu en kanal för resårbandet. (Jag nålade på bilden, men tog tillstlut bort dem och sydde på fri hand.) Tänk på att den ska vara tillräckligt bred för att du enkelt ska kunna dra igenom resårbandet.
- Sy sedan en raksöm i nederkanten. Tänk på att inte sy hela vägen runt, utan lämna en öppning där du kan trä igenom resårbandet.

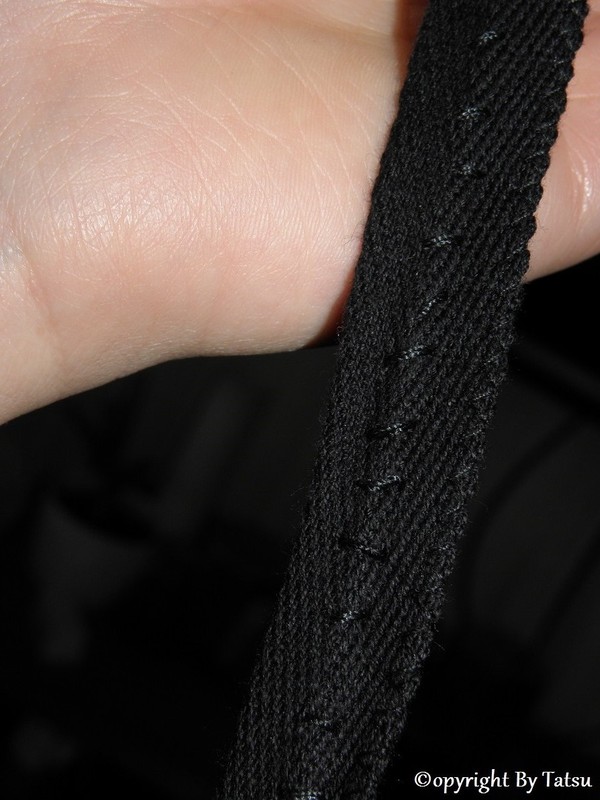
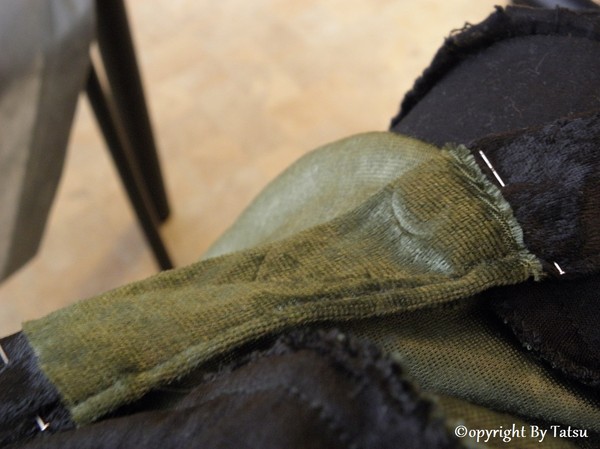
- Klipp ut ett resårband i en bra längd. Lite tajtare än dina höfter, då det är stretchbart och ska hålla upp kjolen. Men inte för kort, för då blir det obekvämt.
- Sätt en säkerhetsnål i resårbandet. Inte så som jag gjorde på bilden utan i kanten. Dra igenom resårbandet i kjolen. Se till att det inte snurrar inuti.

- När du nu har fått igenom resårbandet så syr du ihop det med två raksömmar som på bilden.
- Sedan syr du ihop den lilla öppning som du trädde resårbandet igenom.

- Dags att sicksacka nederkanten! Tänk nu på att vika in kanterna åt samam håll som du gjorde där uppe.
- Vik sedan kanten och sy en raksöm. Inte heller här vill vi att sicksacksömen ska synas i den färdiga kjolen.
- Dags att testa kjolen för att kunna justera längden med den sista sömmen! Enklaste är att nåla upp den i rätt längd, men jag gjorde det på fri hand. Vik in kanten igen så att du får önskad längd på kjolen och sy den sista raksömmen.
Din kjol är nu klar!
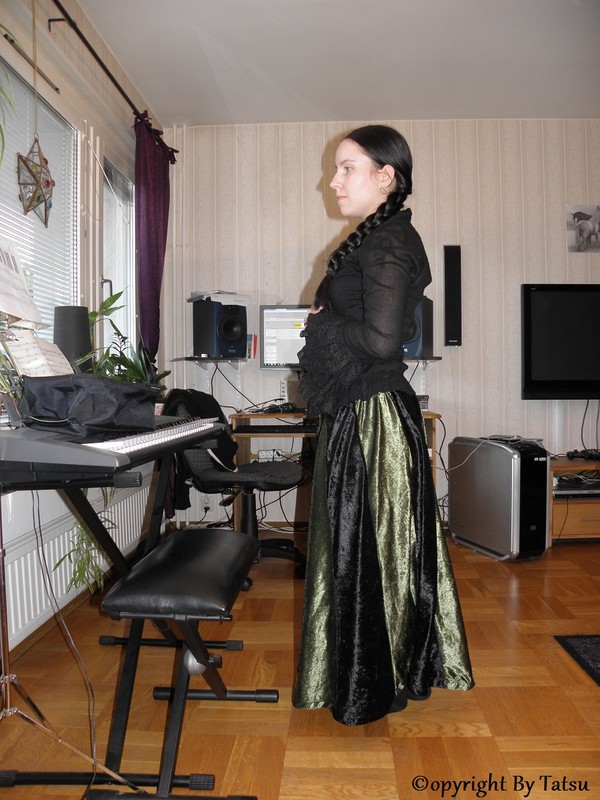
Nysydd kjol
Förra lördagen så sydde jag en kjol. Det är första gången som jag påbörjar och avslutar ett klädesplagg samma dag.

Jag är nöjd. Den blev fin enligt mitt tycke. Svart och grönt är mina favoritfärger så...
Den är även bekväm. Luftig utan att vara för varm eller för kall. Vill jag ha den på vintern så kan jag ha underkjolar för värme och mer "fluff i kjolen". Dessutom så kan man ta stora steg utan att känna sig begränsad då den är väldigt vid nertill.
För er som vill sy någonting liknande så kommer det upp en beskrivning med bilder imorgon eller på måndag.
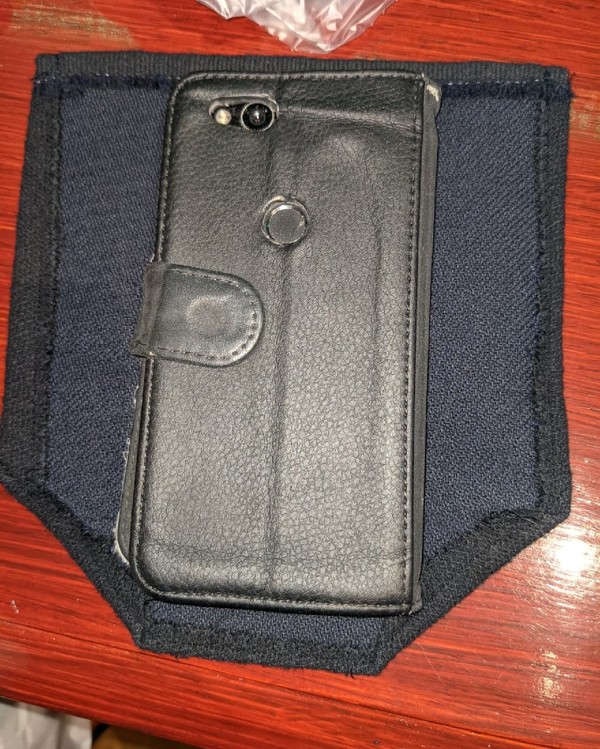
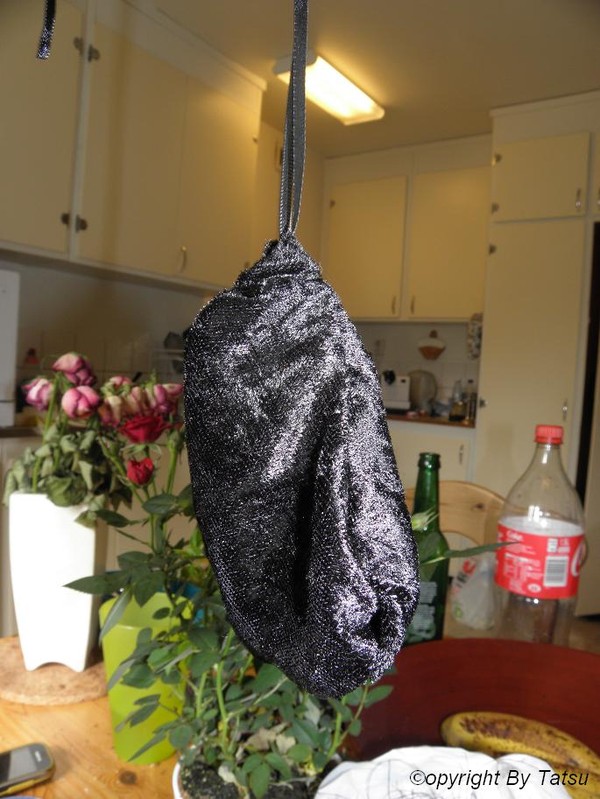
DIY. En förvaringspåse för kläder utan fickor
Detta tycker jag är praktiskt när jag har kjol eller klänning utan fickor, men vill ha med mig min mobil eller annat.
Förkunskaper som krävs:
- Sicksacksöm
- Raksöm
Material och verktyg som krävs:
- Valfritt tyg
- Tråd
- Sax
- Sprätt om du syr fel
- Symaskin
- Tråd
- Säkerhetsnål
- Måttband om du inte har ett bra ögonmått
Välj det tyg du föredrar, men tänk på att det ska hålla för det du väljer att ha i det.

Välj hur stor påse du vill ha. Jag gjorde en som rymmer min mobil eller mp3. Tänk på att den kommer att bli lite mindre än hälften av den storlek du klipper ut, då den ska vikas dubbel och så försvinner en liten bit när man syr ihop den.
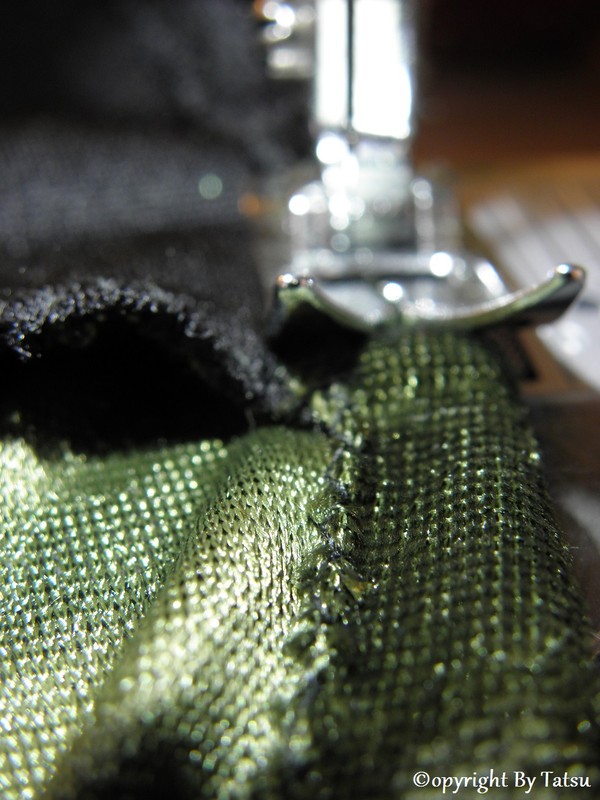
Sicksacka överkanten och övre delen på sidorna.

Vi tyget och sy en raksöm, så att du får en kanal att trä ett snöre igenom.

Vänd påsen ut och in.

Sicksacka ihop kanterna, men inte där kanalen är.

Sy en raksöm i botten och kanten. Sluta där kanalen börjar. Du vill inte sy igen den.

Vänd påsen åt rätt håll.

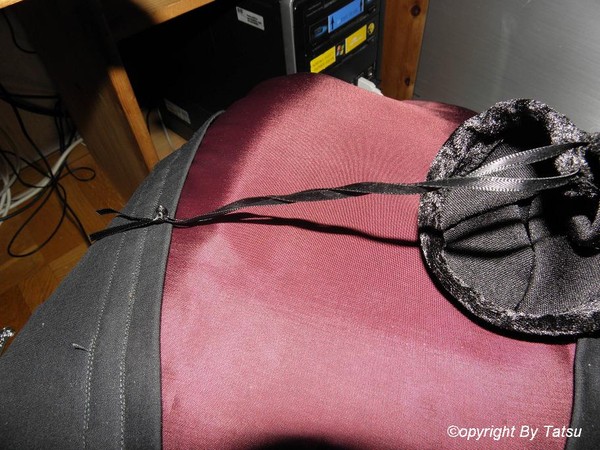
Sedan behöver du ett snöre och en säkerhetsnål. Tänk på att välja ett snöre som håller. Själv har jag valt ett starkt satinband. Om du tar satinband så behöver du bränna kanterna så att det inte repar upp sig.

Använd säkerhetsnålen för att trä snöret igenom kanalen.
Nu har du en färdig påse!
För att enklast kunna flytta din påse mellan olika skärp eller vart du väljer att ha den, så gör en/flera knutar och försäkra dig om att den håller.
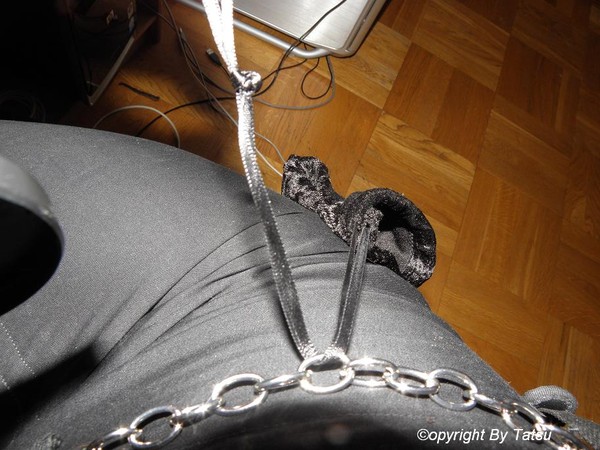
Trä snöret tunt eller igenom skärpet.
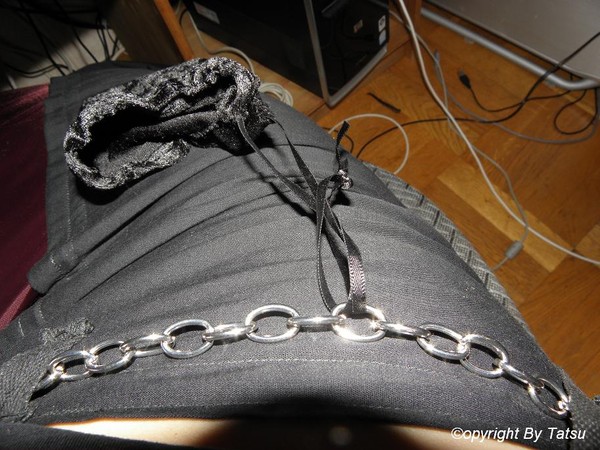
Trä påsen igenom snöret.
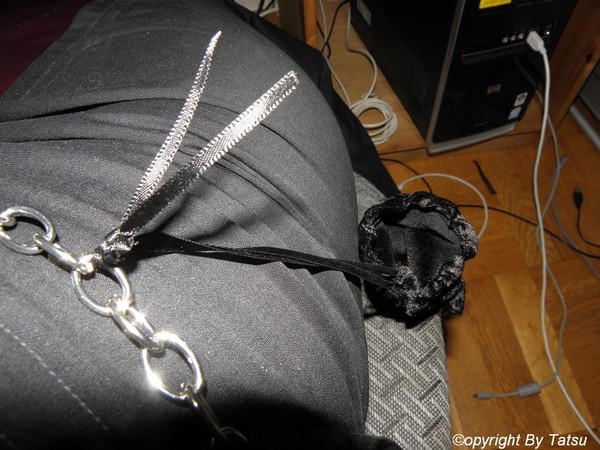
Dra åt. Nu kan du enkelt ta loss din påse när du vill.
Om du vill så kan du självklart smycka eller brodera din påse.
