18 years of growing my hair
Where does time fly!? It's already 18 years since I began to grow my hair long. Is it allowed to drive a car now?

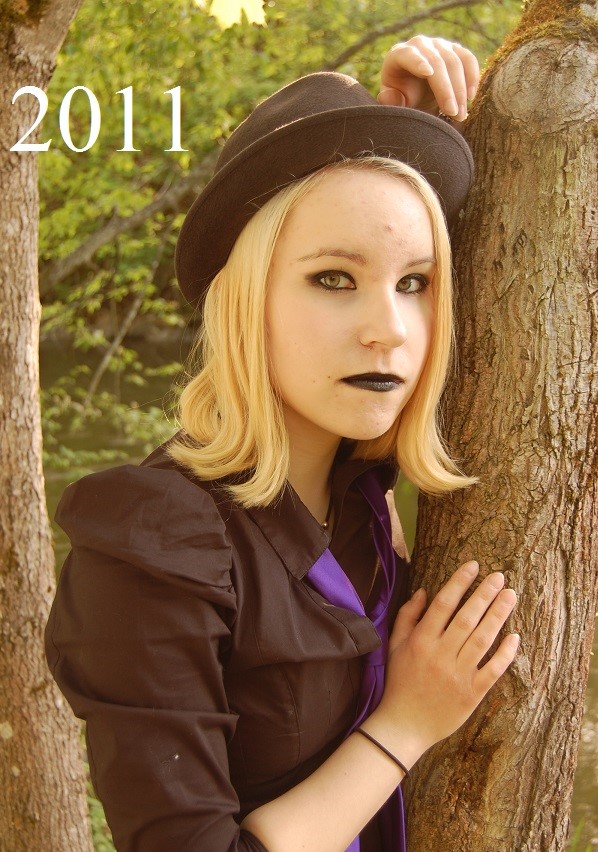
I cut all of my hair to the same length (around 0,5 cm, so a little shorter than in the picture), but kept bangs to have less of a buzz cut. But since I hate having bangs, I soon cut them off too.

Back then I used a really dull scissor to cut my hair and would continue to do so for years. My poor hair!

Don't ask me why, but I bleached my hair... Above is the "carrot phase".
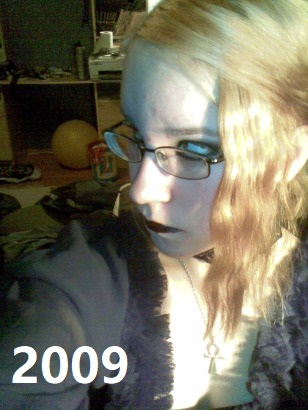
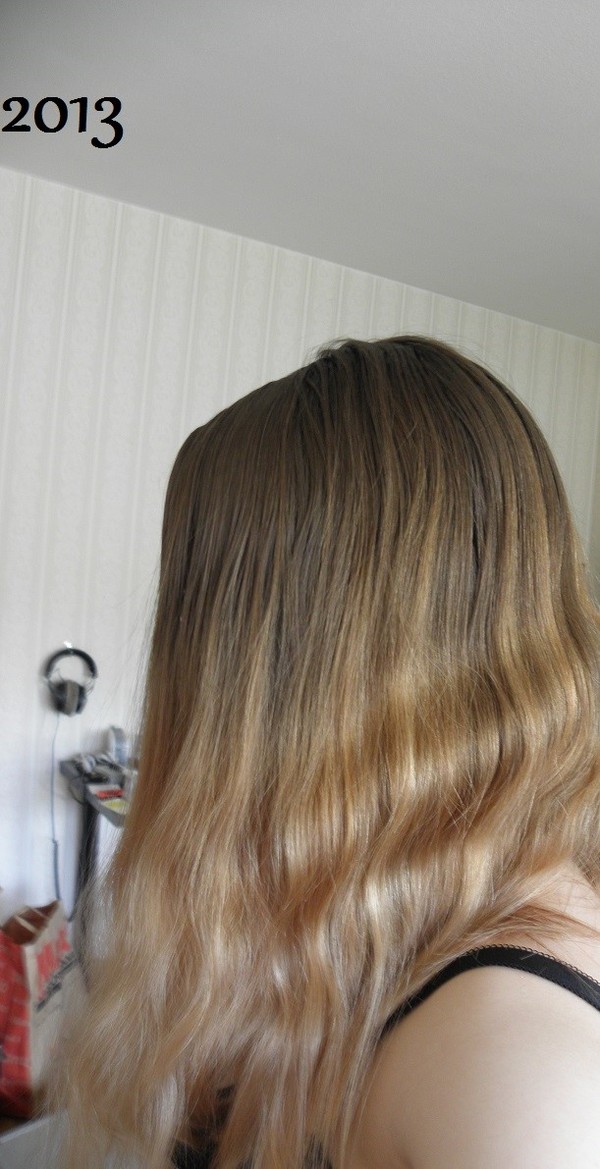
Blond and abused hair.

Of course, I soon missed having black hair.
Even if you can't see it, I still hadn't found any hair products, that my hair really liked. And my scalp was a flaking itchy thing.

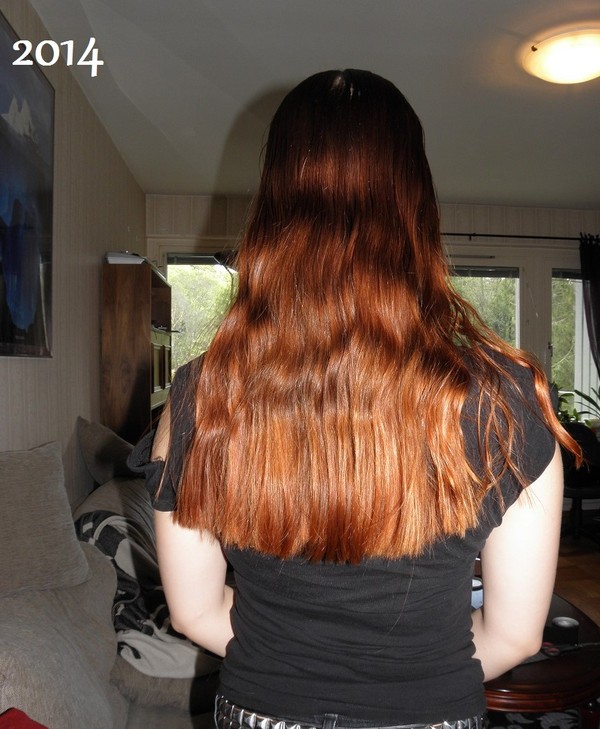
I decided to, for the last time in my life, bleach my hair, before dying it red and then go back to black once and for all. And thus the "carrot phase" again.

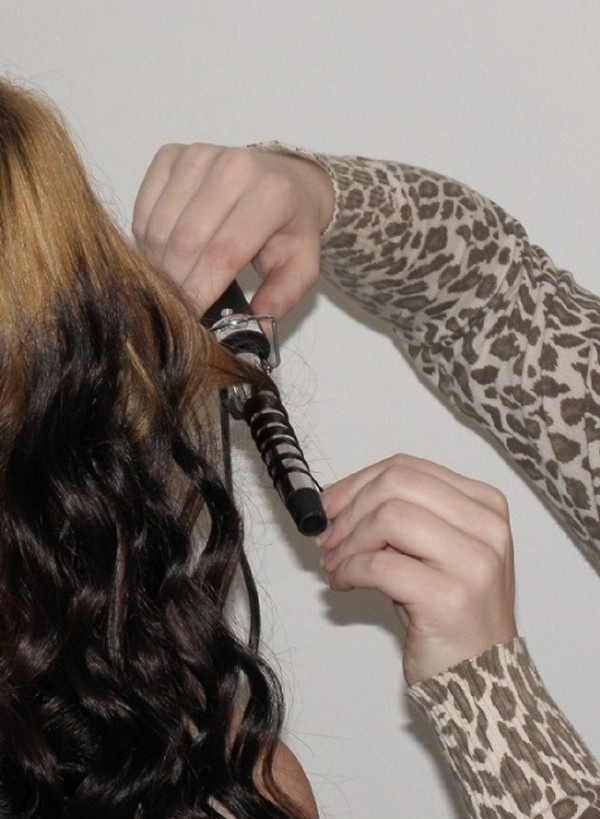
I also used to let a friend heat style my hair and I was still in search of products that my hair really liked.

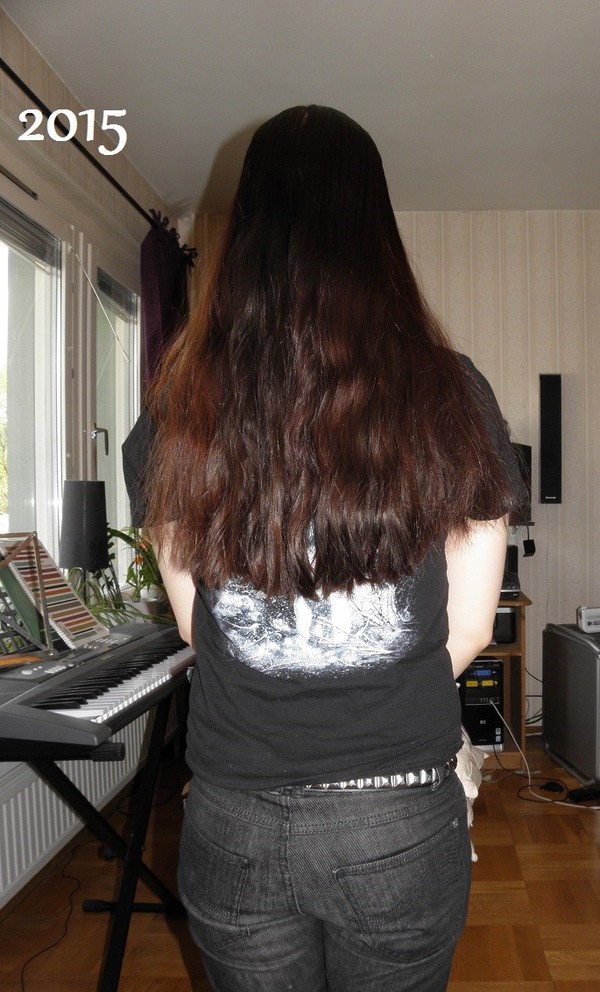
I really enjoyed red hair, but red washes out so fast!

Before my elbow surgery, I had to wash my hair with disinfection. Other than drying out my hair, it also washed away most of the colour.

Before jumping in to the shower to do my first conditioner only wash. This is where I finally found something that actually worked for my hair and scalp.
Even though I've switched products, I'm still CO-washing today and never use shampoo. I've discovered that my scalp and skin actually hates sulfates.

This is what my natural hair looked like, after a year of CO-washing and when most of the bleach had been cut away.

I decided to never again use chemical dyes and wanted to be a henna head for a while, before starting the process of getting it black with indigo. This was when I first began taking proper hair pictures and also when I first joined the Long Hair Community, altough it would take another year before I became active.

You can read about my hendigo journey here
Black again.


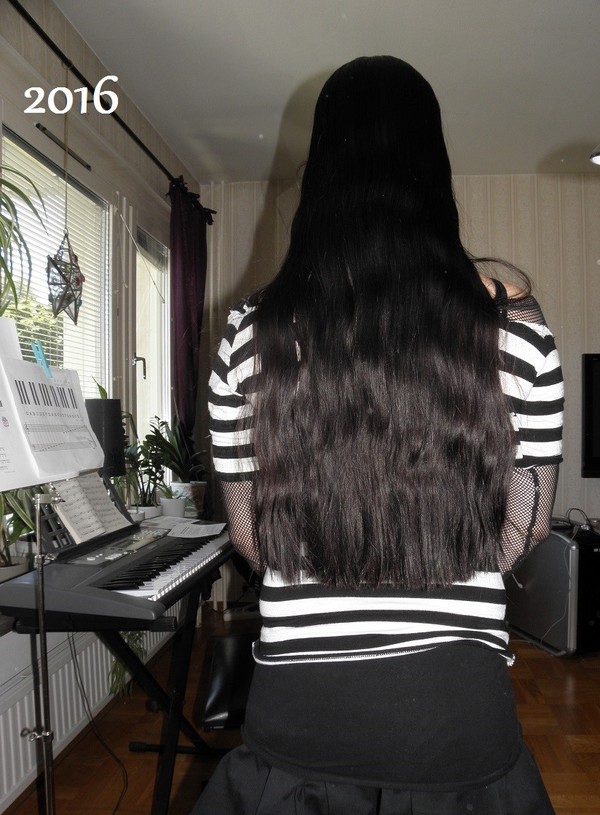
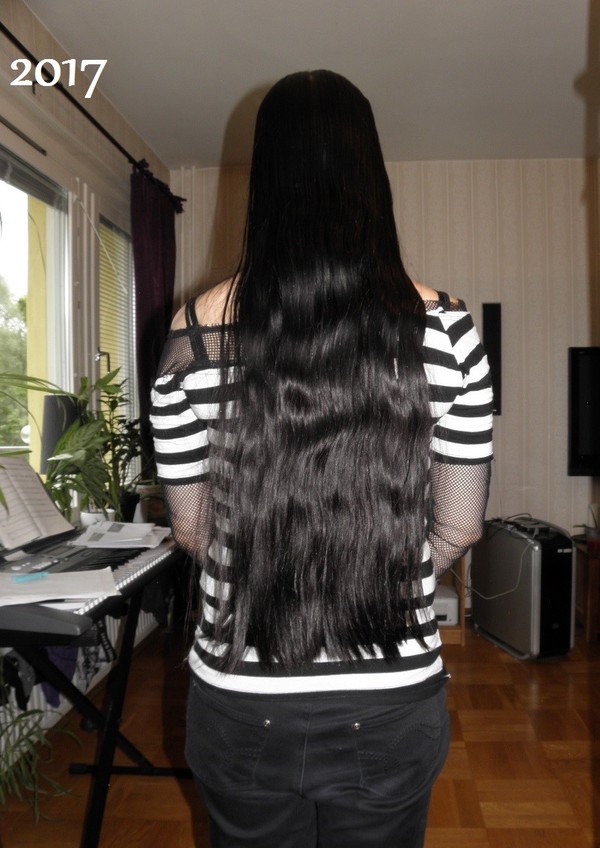
Having kept up with some heavy S&D and minimal trims for years. My hemline was starting to fairytale.

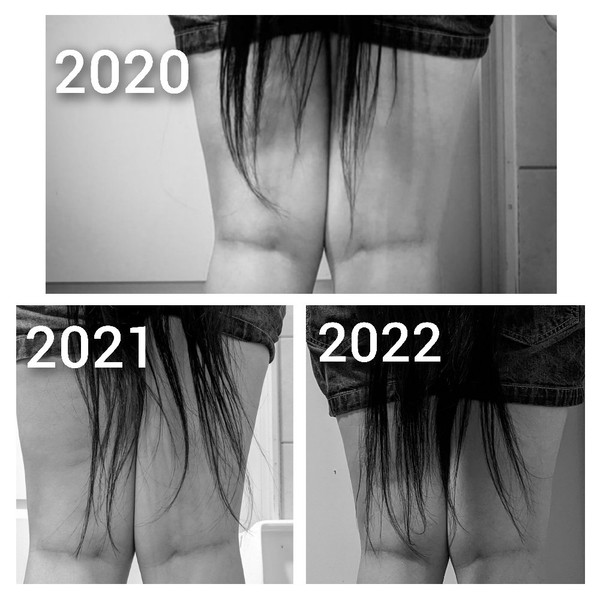
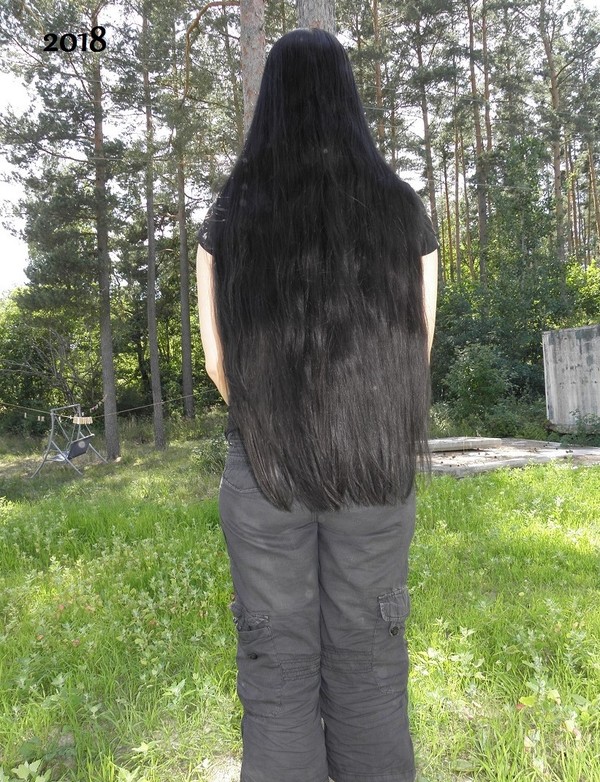
My thin ends reached knee by the end of 2020. The ends were actually thinner than you can see in the picture. I began to maintain at knee.

The ends were still thin, but the thickness was traveling down, since I was maintaining at knee.

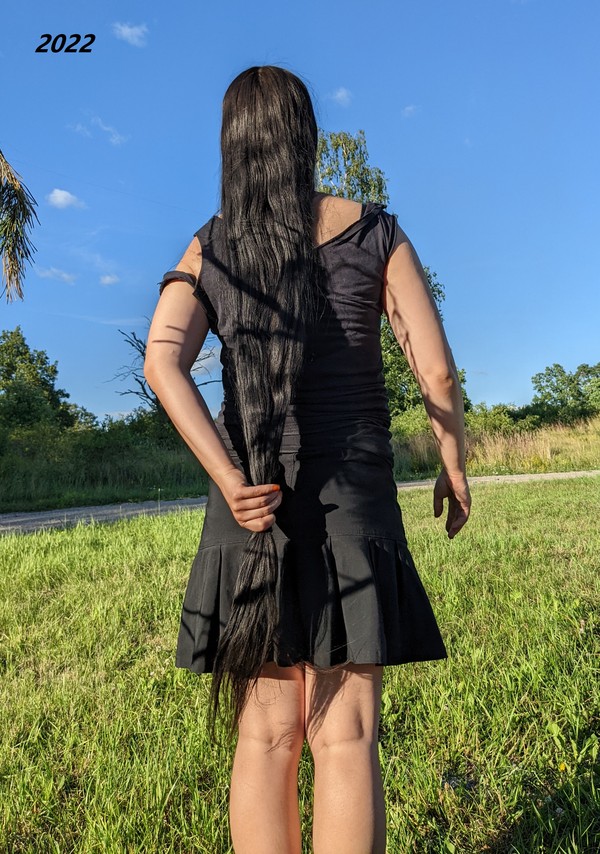
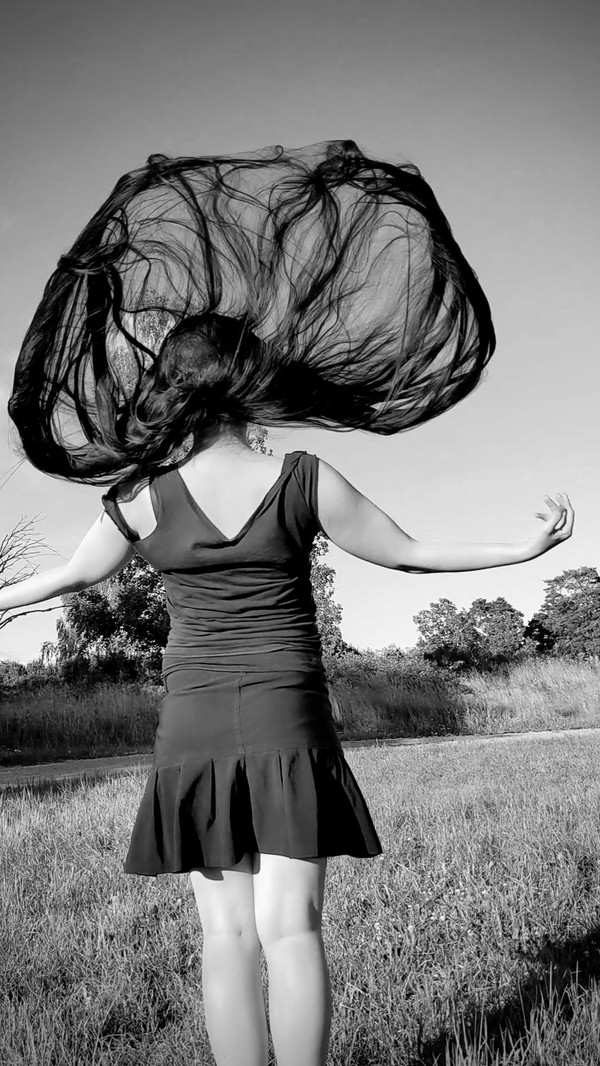
Since nothing had happended lenght wise, I went with a more "fun" picture for 2022.

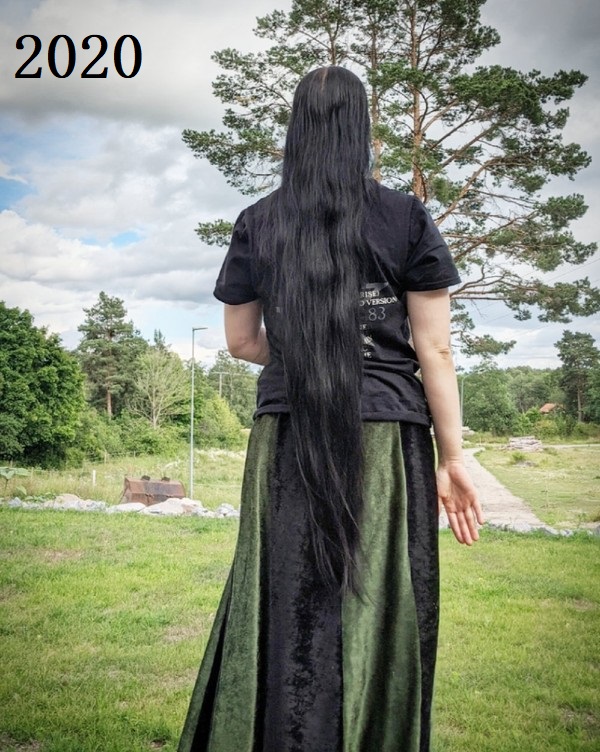
I switched from maintaining to microtrimming, as to allow the hair to grow, while still trimming to let thickness travel down. I reached calf length.

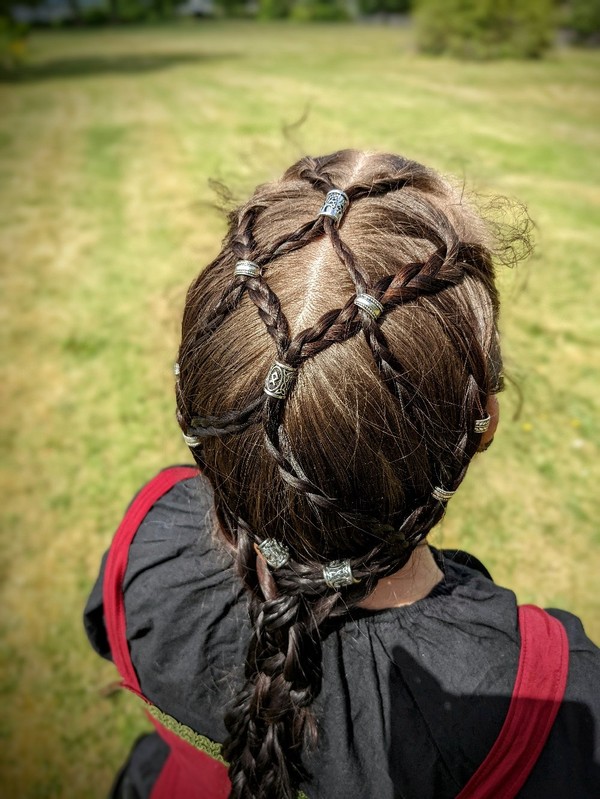
And here we are now. I'm still microtrimming. Altough I've had to and still have to do more S&D after running around at a festival with loose hair. It was worth it! The thickness is still traveling down and the length is slowly creeping downwards. I'm in no hurry to get somewhere. Because my hair is currently in several braids, you won't get a measurment of the lenght, but by the end of 2024 it was 138,5 cm.

Having fun with my hair and enjoying the journey is more importan to me, than reaching super lengths fast.

Although my hair would have been a lot longer, if I would have taken as good care of it all the way, as I'm doing today. I have no regrets! I had a lot of fun trying different colors and doing stuff with my hair!

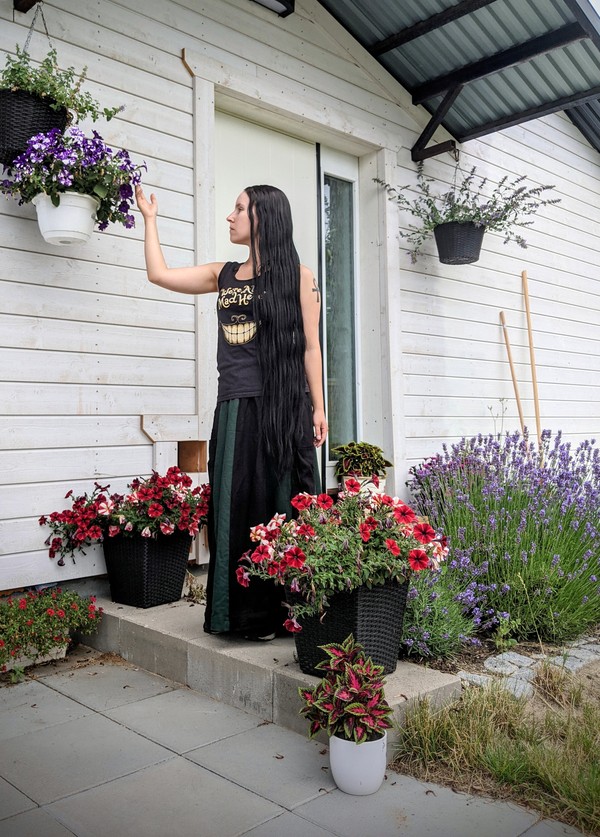
I often get asked the question "why have long hair if it's almost never down". Well, because it's my hobby. Because I enjoy spending two hours making small braids and doing different updos with them.

And because different hairtoys are fun. And just like those dresses in my closet, that I only wear once in a while, I sometimes but rarely do enjoy to let my hair down.

And as I always end these threads. I will continue to have fun with my hair and I hope you do too!
NightBloomin
After I really started to think that my package was lost, I got an update that it was in Sweden on I could pay the fees. Yesterday it finally arrived!


The catnip is obviously for the cats. We've been out for a couple of weeks.
I've been so low on salve and I was afraid to run out completely before getting a new jar. I'm using it for my face and I've tried to use as little as possible. Now I can slather it on as usual again.
I got two conditioner bars of the limited edition Victorian Lady. (Available for patreons.) They smell lovely and I'm really looking forward to trying it. As one bar lasts for years I'm soon set for life...
Hair growth and hair year
My hair wanted to be wavy, so I had a hard time taking pictures. But here they are!

I'm still microtrimming to thicken up the ends, while still growing the hair a bit. Last year it was 134 cm and today it's 138,5 cm.

You can see how it's grown, since I first reached knee.

Close up of the ends.

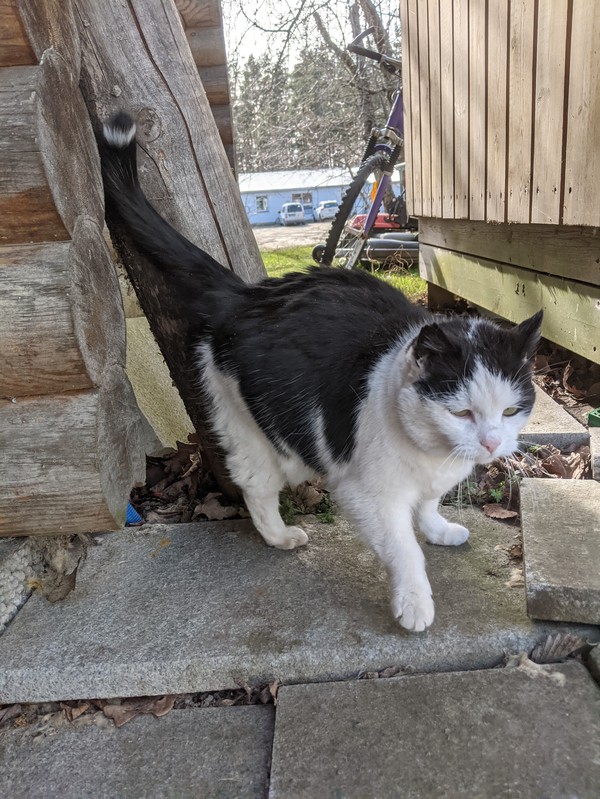
I'm most happy to have reached the milestone of cat length. My second smallest cat height wise in the picture. Mårran.
As for my hair year. I got rid of most of my split ends. I went to Germany for M'era Luna and spent a windy day at a festival with my hair loose, cultivating new splits. I had fun and saw no one with longer hair than me, so it was totally worth it!
I've been doing S&D since then, to get rid of those splits. This is the main reason my hair is barely longer or thicker. And I may also be closing in on terminal. I'm still happy with my hair and my main goal is still to have fun with it.
Overall I haven't cared a lot about my hair this year. I've mostly kept it up under a scarf and forgotten about it.
We'll see what type of hair year 2025 will be!
17 years of growing my hair
Another year has passed and its time for another anniversary!
I cut all of my hair to the same length (around 0,5 cm, so a little shorter than in the picture), but kept bangs to have less of a buzz cut. But since I hate having bangs, I soon cut that off too.
Back then I used a really dull scissor to cut my hair and would continue to do so for years. My poor hair!
Don't ask me why, but I bleached my hair... Above is the "carrot phase".
Blond and abused hair.
Of course, I soon missed having black hair.
Even if you can't see it, I still hadn't found any hair products, that my hair really liked. And my scalp was a flaking itchy thing.
I decided to, for the last time in my life, bleach my hair, before dying it red and then go back to black once and for all. And thus the "carrot phase" again.
I also used to let a friend heat style my hair and I was still in the search for products that my hair really liked.
I really enjoyed red hair, but what a hassle to keep it red!
Before my elbow surgery, I had to wash my hair with disinfection. Other than drying out my hair, it also washed away most of the colour.
Before jumping in to the shower to do my first conditioner only wash. This is where I finally found something that actually worked for my hair and scalp.
Even though I've switched products, I'm still CO-washing today and never use shampoo.
This is what my natural hair looked like, after a year of CO-washing and when most of the bleach had been cut away.
I decided to never again use chemical dyes and wanted to be a henna head for a while, before starting the process of getting it black with indigo.
The process of getting it black. It took some time and effort, but it was worth it. Also, my hair finally started to get longer for real, now that I no longer mistreated it.
You can read about my hendigo journey here
Black again.
Having kept up with some heavy S&D and minimal trims for years. My hemline was starting to fairytale
My thin ends reached knee by the end of 2020. The ends were actually thinner than you can see in the picture. I began to maintain at knee.
The ends were still thin, but the thickness was traveling down, since I was maintaining at knee.
Since nothing had happended lenght wise, I wentwith a more "fun" picture for 2022. As you can see, my ends were still quite thin, but thicknes was traveling down and was visible despite the eight braids in my hair.
Since my last anniversary, I've switched maintaining to microtrimming. Meaning that I cut away around half of what I gain every month. This allows my hair to get longer, while still allowing thickness to travel down.
I'm now at calf length (137 cm) with my thin ends. I don't think that I will get a thick hemline at this length, but thickness is still traveling down.

I believe that getting long hair is only part of it. Enjoying the journey and having fun along the way is even more important!

Although my hair would have been a lot longer, if I would have taken as good care of it all the way, as I'm doing today. I have no regrets! I had a lot of fun trying different colors and doing stuff with my hair!

And now I am having fun with different updos and hair toys.

I will continue to have fun with my hair and I hope that you will too!
Hair Myths on YouTube
I finally felt inspired to make a new YouTube vieo!
Hair growth
I had to go back three years to find when I last measured my hair. 129,5 cm and my thin ends had just reached knee.


Since then until this summer, I have maintained at knee to allow thickness to travel down.
There's still some thickness travelling down, but more slowly now. Perhaps I am closing in on terminal.
Since this summer, I've switched over to microtrimming. Meaning that I'm still trying to thicken up the ends a bit, but also allowing the hair to grow longer again.
The hair is now 134 cm.
16 years of growing my hair
Not much to update on this year, but what the heck. Let's do this!
I cut all of my hair to the same length (around 0,5 cm, so a little shorter than in the picture), but kept bangs to have less of a buzz cut. But since I hate having bangs, so I soon cut that off too.
Back then I used a really dull scissor to cut my hair and would continue to do so for years. My poor hair!
Don't ask me why, but I bleached my hair... Above is the "carrot phase".
Blond and abused hair.
And of course, I soon missed having black hair.
I decided to for the last time in my life, bleach my hair, before dying it red and then go back to black once and for all. And thus the "carrot phase" again.
I also used to let a friend heat style my hair.
I really enjoyed red hair, but what a hassle to keep it red!
Before my elbow surgery, I had to wash my hair with disinfection. Other than drying out my hair, it also washed away most of the colour.
Before jumping in to the shower to do my first conditioner only wash.
This is what my natural hair color looked like, after a year of CO-washing and when most of the bleach had been cut away.
I decided to never again use chemical dyes again and wanted to be a henna head for a while, before starting the process of getting it black with indigo.
The process of getting it black. It took some time and effort, but it was worth it. Also, my hair finally started to get longer for real, now that I now longer mistreated it.
Black again.
Having kept up with some heavy S&D and minimal trims for years. My hemline was starting to fairytale.
My thin ends reached knee by the end of 2020. The ends were actually thinner than you can see in the picture.
Trying to get my hair to not blow freely in the wind... The ends are still thin, but the thickness is traveling down, since I'm maintaining at knee.
Since nothing has happended lenght wise, let's just go with a more "fun" picture for this year. As you can see, my ends are still quite thin, but thicknes is traveling down and is visible despite the eight braids in my hair.

I think that I'm finally ready to "start growing" again and to go from maintaining to microtrimming. Meaning that my hair should get a few centimeters longer each year, while still thickening up the ends a bit.

I believe that getting long hair is only part of it. Enjoying the journey and having fun along the way is even more important!

Although my hair would have been a lot longer and probably thicker at the ends, if I would have taken as good care of it all the way, as I'm doing today. I have no regrets! I had a lot of fun trying different colors and doing stuff with my hair!

And now I am having fun with different updos and hair toys.
And I'm also enjoying talking to the fellow enthusiasts, that I've found online during this time. My favorite place still being the Long Hair Community.
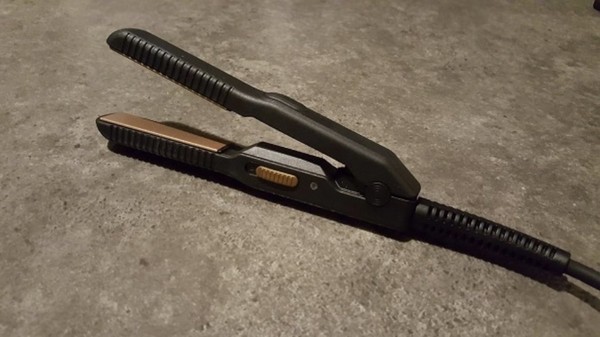
How heat styling affects the hair
That heat styling isn't good for your hair, is hardly news for anyone. But how does it actually affect the hair? And is all heat bad?
At exactly what temperature and how many times is necessary to completely "ruin" your hair, depends on your hair quality and what it's already been through. For example dyed or bleached hair will be more sensitive.
What happens to the hair when it's exposed to high heat?
One of the things that will happen, is that the proteins in your hair, will be weakened and eventually break down.
The moisture that's supposed to be in your hair will boil and evaporate. This will cause microscopic bubbles/holes in your hair. And of course make it dryer.
Together with the damaged/broken down protein, it will eventually lead to split/damaged ends, a damaged cuticle, where the scales at first stay open and eventually fall off. This leaves the core of the hair exposed and vulnerable. And the hair looses it's natural ability, to hold moisture and nutrients, on its own.
Strong heat can also permanently affect both ones natural or dyed hair colour and structure. It's common for the hair to get dry, strawlike and tangled.
In order to regain ones natural hair quality, one has to let it grow back from the scalp.
Does all heat damage the hair?
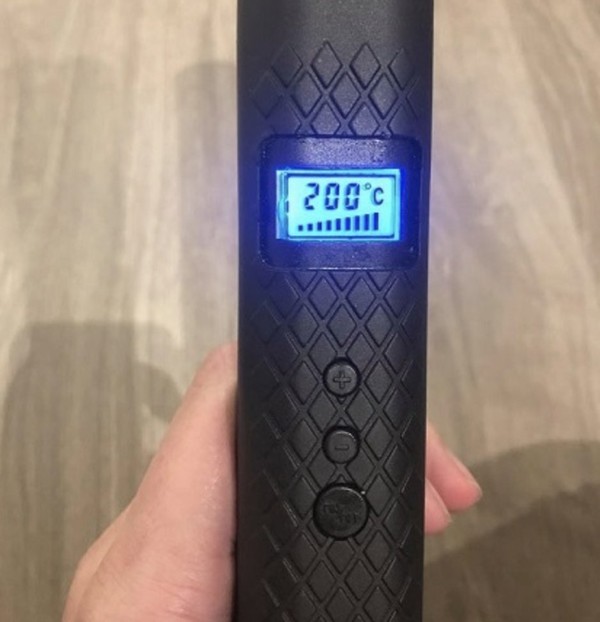
All heat tools can potentially damage the hair. The higher temperature, the more damage it can cause. The same with regular exposure.
If you hold a flat or curling iron in your hair too long, you can burn of an entire strand.
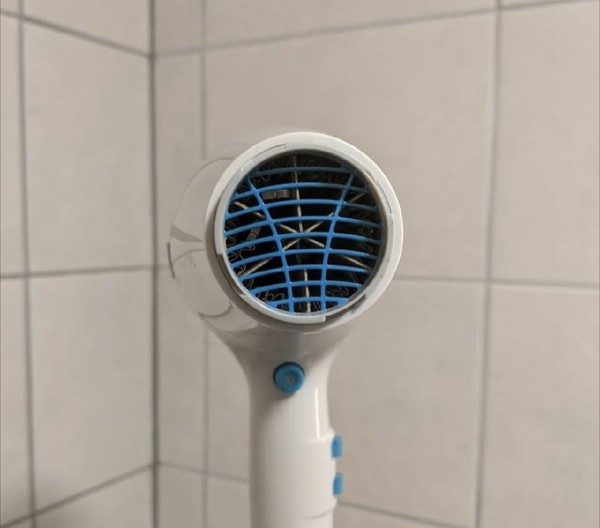
For hair dryers, a cold or low heat setting isn't damaging to the hair. And if you're using a higher temperature, you want to keep the dryer farther away from your hair, to make it "safe".
According to studies, 60 C or cooler shouldn't damage your hair and can even be better than air drying, if your hair takes a long time to dry.
As a general rule. Keep a temperature and distance that doesn't feel uncomfortable for your skin. Then it's safe for your hair. You want to use a hairdryer and not a hairfryer!
What can you do if your hair is heat damaged, or you don't want to give up the heat styling?
You cannot repair damaged hair. Only cut it away.
If you don't want to cut away your hair or just continue with heat styling. Make sure to take good care of your hair with lots of moisture, potentially some fat and protein. But not immediately before putting an iron in your hair. You always want it to be dry when heat styling.
Silicones can help to retain moisture and nutrients in the hair and potentially glue splits together for a short time. Some people also gets more slip and shine from them. But make sure to properly clean them away with sulfates to prevent build up!
A silicone based heat protector can not prevent damage, but it can help to retain some moisture in your hair and lessen the damage in the long run.
So what does Tatsu do?
As you've probably guessed. I don't own a flat or curling iron. I do however own a hair dryer, that I use a few times a year, on a cold setting, when I don't want to wait six hours for my hair to dry. Sometimes I just sit infront of a fan or take a windy walk if the weather allows.
My hair year

Another year of maintaining and you can see the result!
15 years of growing my hair
It's 15 years now since I first started this journey. How did this happen!?

I cut all of my hair to the same length (around 0,5 cm, so a little shorter than in the picture), but kept bangs to have less of a buzz cut. But since I hate having bangs, so I soon cut that off too.

Back then I used a really dull scissor to cut my hair and would continue to do so for years. My poor hair!

Don't ask me why, but I bleached my hair... Above is the "carrot phase".

Blond and abused hair.

And of course, I soon missed having black hair.

I decided to for the last time in my life, bleach my hair, before dying it red and then go back to black once and for all. And thus the "carrot phase" again.
I also used to let a friend heat style my hair.

I really enjoyed red hair, but what a hassle to keep it red!

After I had to wash it with some special stuff before my elbow surgery, most of the dye washed out and I decided to let the bleached hair grow out and slowly cut it away before dying it black.
Before jumping in to the shower to do my first CO-wash.

This is what my natural hair color looked like after a year of CO-washing and when most of the bleach had been cut away.
I decided to never again use chemical dyes again and wanted to be a henna head for a while, before starting the process of getting it black with indigo.
The process of getting it black. It took some time and effort, but it was worth it. Also, my hair finally started to get longer for real, now that I now longer mistreated it.

Black again.


Having kept up with some heavy S&D and minimal trims for years. My hemline was starting to fairytale.

My thin ends reached knee by the end of 2020. I've been maintaining at knee since then and will continue for a while longer. The ends were actually thinner than you can see in the picture.

Having reached this length. I still want longer hair, but am in no hurry to get there. Patience truly is the key to growing long hair.
But it's also important to have fun! Have fun with your hair and treasure every milestone!

Although my hair would have been a lot longer if I would have taken as good care of it all the way, as I'm doing today. I have no regrets! I had a lot of fun trying different colors and doing stuff with my hair!
And now I am having fun with different updos and hair toys.
But also in the lovely community I've found of fellow hair interested people, in different corners on the internet, such as The Long Hair community, Instagram and HårIfokus.
New YouTube video! Unboxing
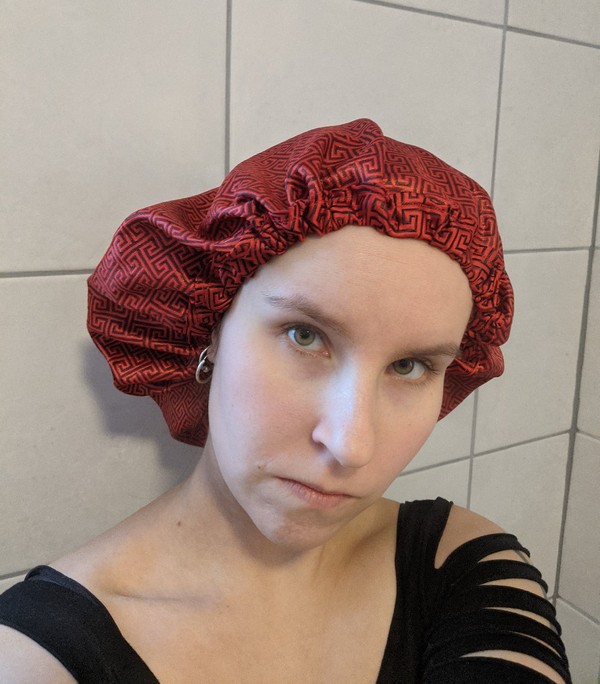
New shower caps!
I've been unable to find any good shower caps in Sweden. The ones Im have are a bit too small for my buns and the elastic hasn't been the best.

So I bought these from Etsy!
https://www.etsy.com/shop/AfricanFabs
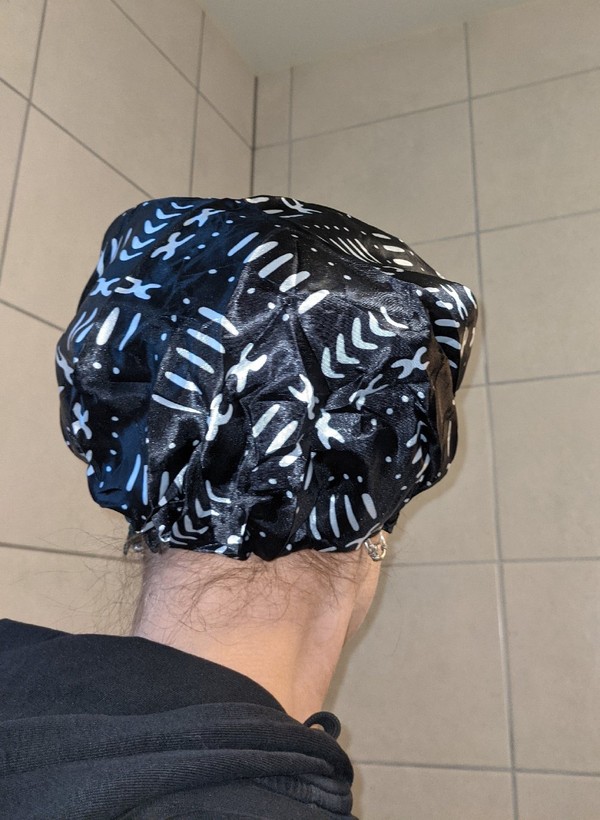
Big enough to fit nicely over my bun!
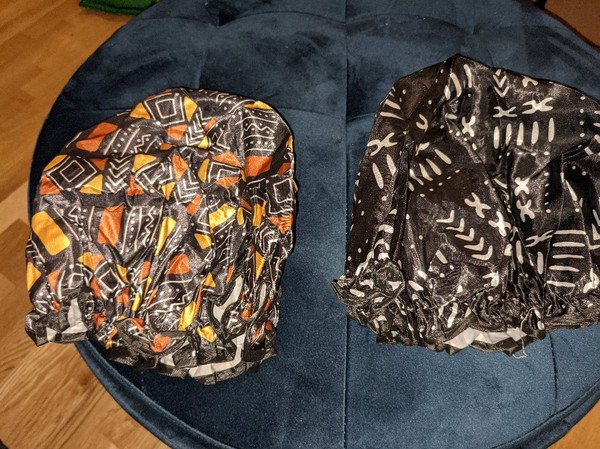
I will give the colorful one to my mother.
14 years of growing my hair
It's now 14 years since I had a side cut and decided that I wanted long hair.
I cut all of my hair to the same length (around 0,5 cm, so a little shorter than in the picture), but kept bangs to have less of a buzz cut. But since I hate having bangs, so I soon cut them off too.
Back then I used a really dull scissor to cut my hair and would continue to do so for years. My poor hair!
Don't ask me why, but I bleached my hair... Above is the "carrot phase".
And of course, I soon missed having black hair.
I decided to for the last time in my life, bleach my hair, before dying it red and then go back to black once and for all. And thus the "carrot phase" again.
I also used to let a friend heat style my hair.
I really enjoyed red hair, but what a hassle to keep it red!
Before jumping in to the shower to do my first CO-wash.
This is what my natural hair color looked like after a year of CO-washing and when most of the bleach had been cut away.
The process of getting it black. It took some time and effort, but it was worth it. Also, my hair finally started to get longer for real, now that I now longer mistreated it.
Black again.
Having kept up with some heavy S&D and minimal trims for years. My hemline was starting to fairytale.
My thin ends reached knee by the end of last year. I am now maintaining them (and keeping up with the S&D) until more thickness reaches the knees. Then I'll continue to grow with microtrims.
Having reached this length. I still want longer hair, but am in no hurry to get there. Patience truly is the key to growing long hair.

But it's also important to have fun! Have fun with your hair and treasure every milestone!
Although my hair would have been a lot longer if I would have taken as good care of it all the way, as I'm doing today. I have no regrets! I had a lot of fun trying different colors and doing stuff with my hair!
And now I am having fun with different updos and hair toys.
But also in the lovely community I've found of fellow hair interested people, in different corners on the internet, such as The Long Hair community, Instagram and HårIfokus.
Sauna, hair wash and a cat
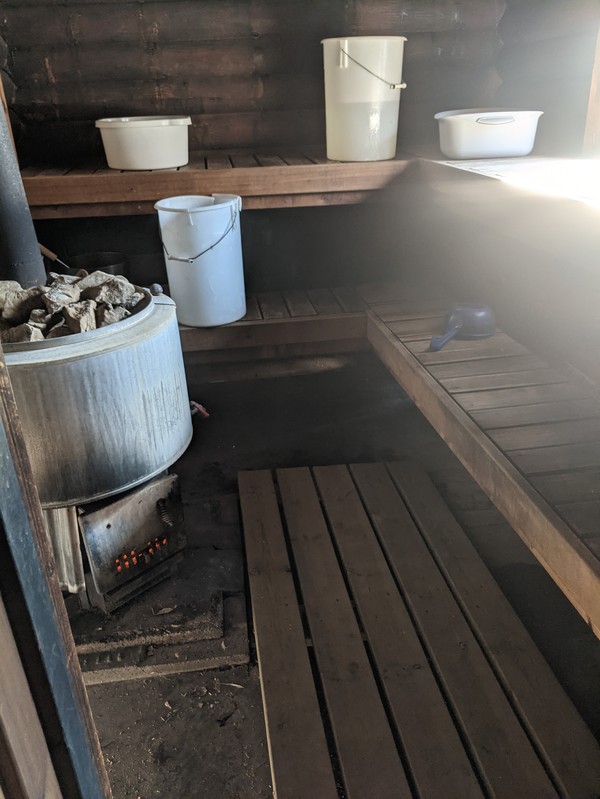

+12 C made it perfect to take water breaks outside.

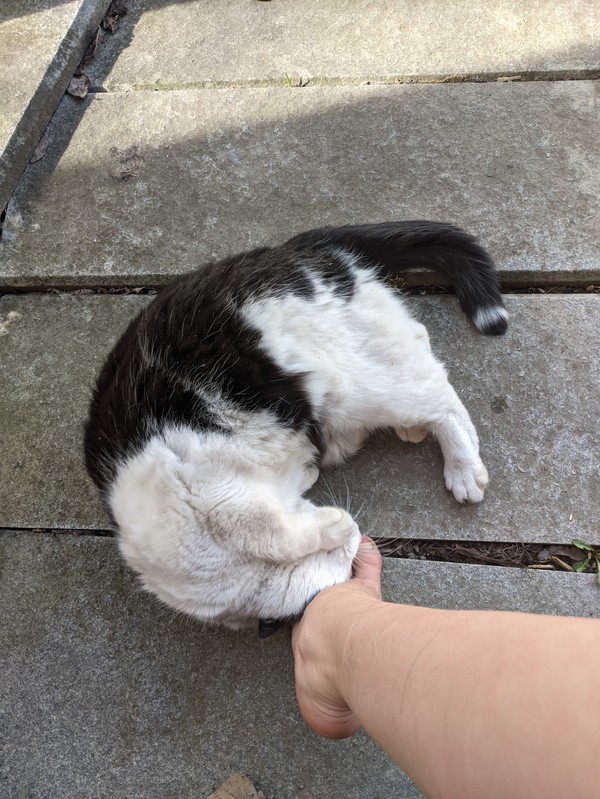
My fathers cat kept me company and demanded that I pet her.

Dirty...
My leg got a bit hairy.


Letting the towel stay on, while I'm eating my sandiwches. The it's air drying time!
New YouTube video! What has affected my hair growth?
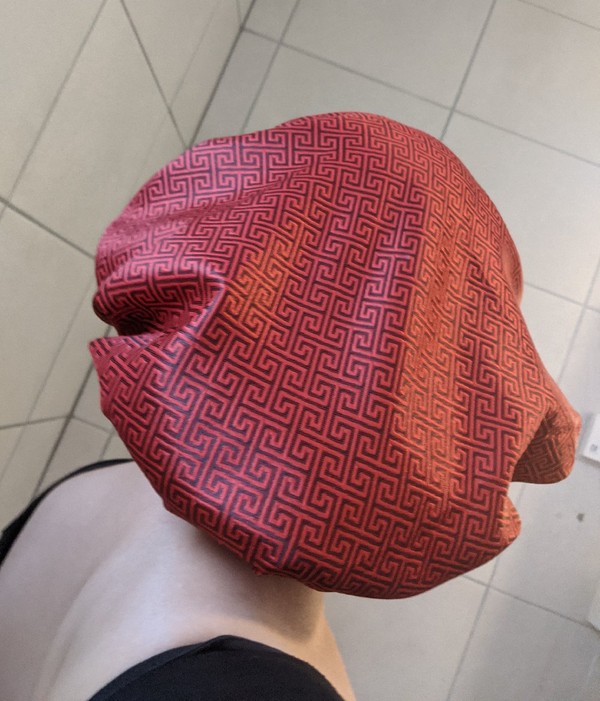
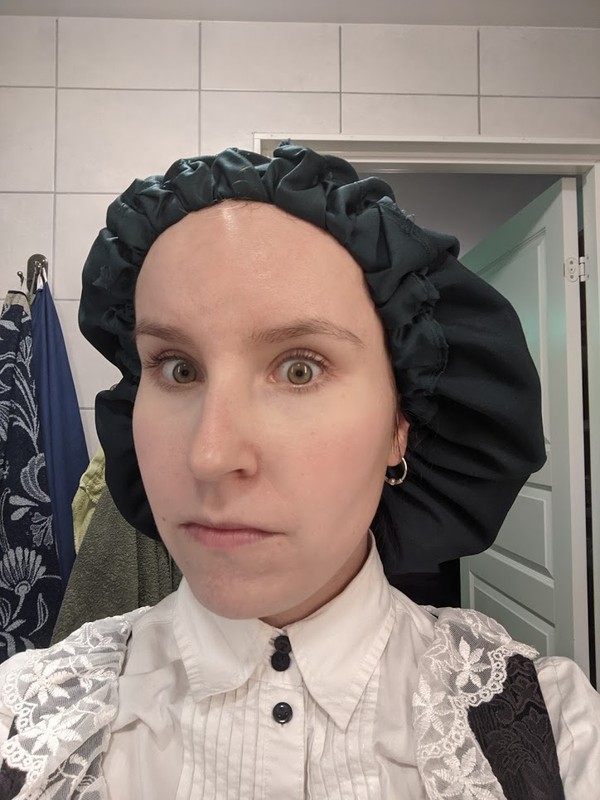
New sleeping cap/nightcap!

I made this from an amazing silk fabric from korps.se

The prettiest side, that you can see here, is actually the inside of my cap, since it's the smoothest.

DIY - make your own nightcap/sleeping cap
You will need:
- A fabric of your choosing. Preferably some sort of smooth satin, such as silk satin or rayon satin.
- Thread
- Elastic or a draw string
- Safety pin
- Sewing machine
- Pencil
- Pattern or a string and needle
How to do it:
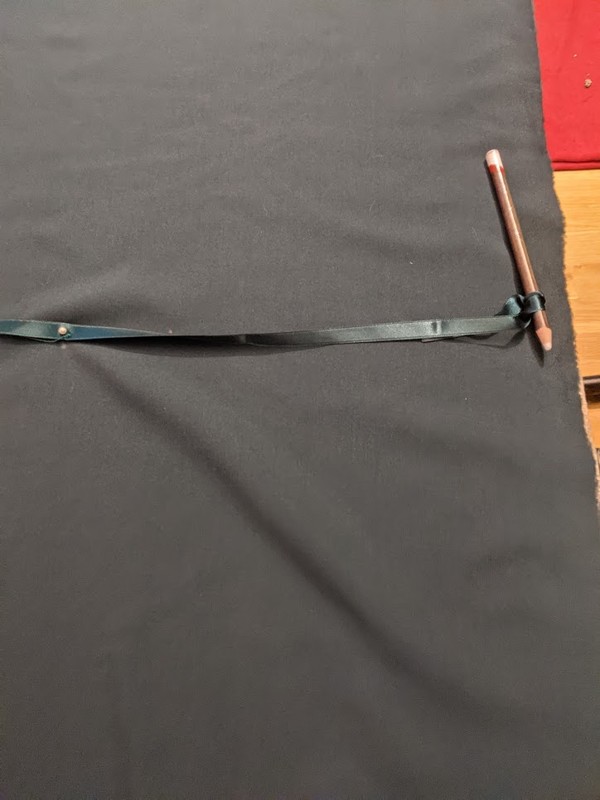
- Draw a circle.
- I put the fabric on a soft surface. I choose the couch, but a bed should be just fine. I took a ribbon and attached it with a needle in the middle.
- Then I measured 30 cm from the needle, to where I attached the pen with a knot.
- I held the needle down with one hand and used the other to draw the circle. (I actually got a bit of help from my boyfriend, to keep the fabric smooth, but you can do it by yourself.)

- Your circle doesn't have to be perfect.
- Zigzag all the way around the fabric.

- Fold the edge and sew running stiches all the way around.
- If like me, you have a fabric with a smoother side. You want the smooth side to be the inside of your cap, to protect your hair.
- To make it more comfortable, I put the "pocket" for the elastic on the outside of the cap.

- Fold the fabric again to make a "pocket" for the elastic and sew another running seam. I folded the fabric every few centimeters, to make wrinkles as I went, because it's a circle and you will end up with a longer piece of fabric on the edge. You can of course pin it before you sew it, but I prefer to just do things as I go. (Lazy Tatsu.)
- While you can place this "pocket" on the inside, I highly doubt that it will be comfortable. So once again I placed it on the outside.
- Leave a 2-4 cm opening.

- Attach your elastic or draw string to a safety pin and pull it through your pocket. You can measure the length before or after.

- Sew the ends of the elastic together.
- If you're unsure that the elastic is a good length for you. Leave the opening. If not, sew it close.

- If you want to decorate your cap, you can attach a bow to it.

And I am about to make more! I want thinner silk ones for the summer and another one in black rayon satin to match our other pillowcases.
How I clean my hair with a boar bristle brush
New Youtube video!
My first unboxing video!
My homemade hair mask and hair wash
I often get asked how I make my hair masks so here we go!
If you want to try it, you can use the ingredients that feels right for you, or that you have at hand and skip the rest. I always use all of the ingredients from the first three cathegories.

Base ingredients:
- Fermented rice water (recepie below) - Can clean the hair and scalp. Good for a dry scalp, adds shine and slip to the hair. Makes the hair soft. Can help with hair loss.
- Tea - Good for a dry scalp. Good for circulation and can stimulate growth for some people. Adds shine and slip.
- Stinging nettle - Good for a dry scalp, dandruff and other scalp problems. Adds shine to the hair. Can help with hair loss.
- Cat nip - Adds shine and slips. Said to prevent split ends.
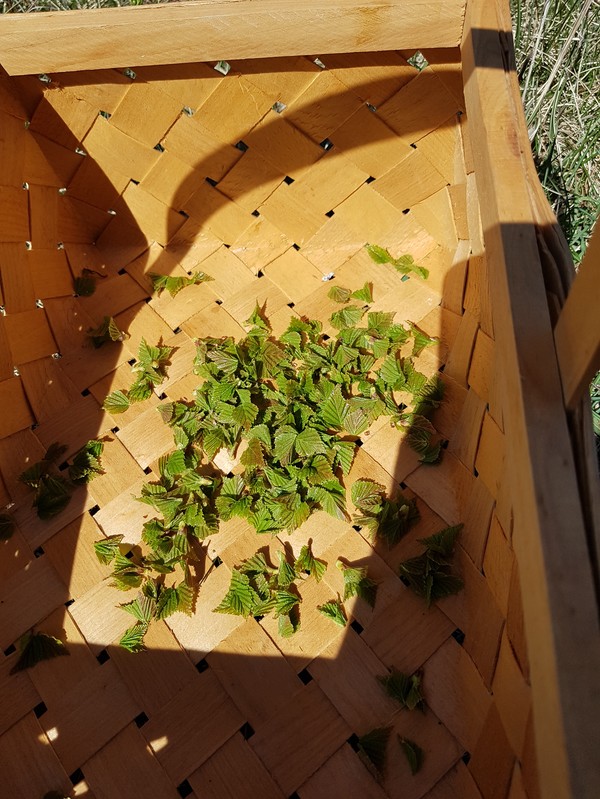
- Birch leaves - Adds shine and slip to the hair. Good for the scalp. Can be used for cleaning the hair.
- Hibiskus (can be replaced by vinegar) - Lowers the pH, wich is good for the hair and scalp. Good for shine and slip. Good for scalp problems.
- Rosemary - Can clean the hair. Adds slip and shine. Good for the scalp.
Optinonal ingedients that I always use:
- Lavendel - Fragrance and good for the scalp
- Crushed oats - Good for dry hair and scalp. Can add shine and slip.
- Flax seeds - Humectand (Moisture). Adds slip and shine.
- Chamomile - Good for the scalp.
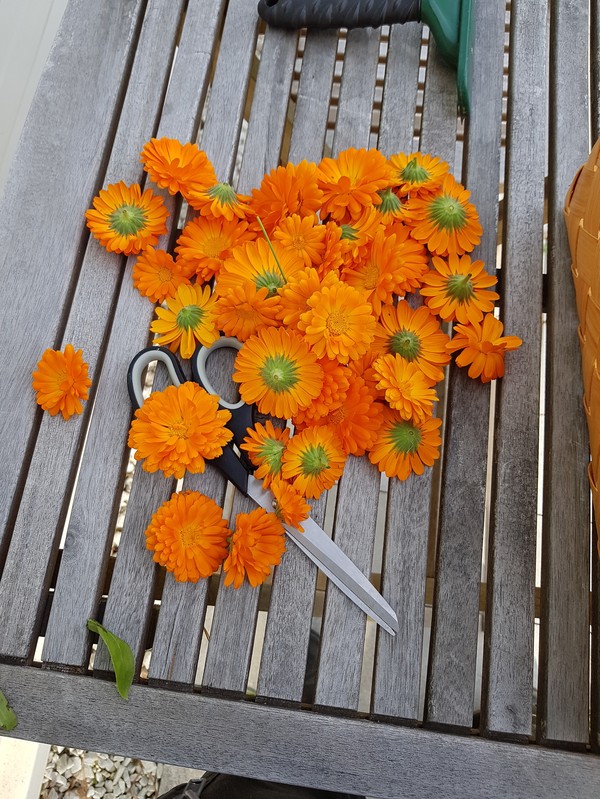
- Marigold - Good for the scalp and can help with problems such as dandruff.
Optional ingredients that I often use:
- Honey (one table spoon) - Can clean the hair. Humectant (moisture). Good for the scalp and can help with problems such as dandruff.
- Horsetail - Good for the scalp. Can add shine to the hair
- Aloe vera - Humectant (moisture), adds slip and shine. Good for a dry scalp.
- Fenugreek - Mild protein. Can be good for growth and hair loss. Good for the scalp. My hair normally doesn't like protein, but fenugreek works just fine.
- Apple cider vinegar - Good for the scalp. Can help with problems such as dandruff. Adds shine and slip to the hair. Lowers the pH wich is good.
Ingredients that I sometimes use:
- Lilac - Fragrance
- Jasmine - Fragrance
- Sage - Mainly because I grow it. I am yet to reserach it
- Mint - Fragrance. Can stimulate growth and reduce hair loss.
How to do it:
Fermented rice water:
This need to be prepared a few days before wash. There are several ways to do it, but here's how I do it:
- You can use any typ of rice and I did that for years. Now I prefer black rice, as it's the only rice that doesn't smell bad, once it's fermented.
- Either put some rice in a jar, cover with water and let sit for 2-3 days or soak the rice for a while. Or soak the rice, strain it. Cook the rice and ferment the water you soaked the rice in.
- Strain it if you left the rice in.

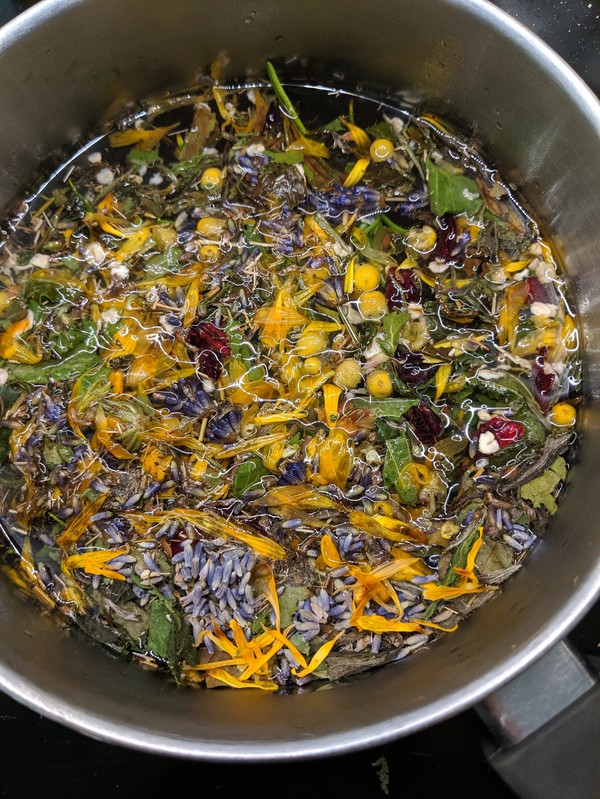
The herbal part:
- Put the herbs and honey in a container of your chosing. One pinch to a fist of each of the ingredients. I might make a video showing the measurments in the future.
- Boil water and pour it over your herbs.
- Let cool down under a lid. The longer it sits, the stronger it gets. You can leave it over night, but I let it sit for around 4-7 hours before straining it.
- Strain it.
- Add the rice water and vinegar.

How to use it:
- It's a liquid, so dip your lengths in it. Pour it over your scalp.
- Cover your hair with a shower cap and/or a towel
- Let it sit for around and hour.
- If you're washing your hair with it, see this post: http://tatsu.blogg.se/2020/june/succesful-wash.htm
- Otherwise, clean and condition your hair as usual

