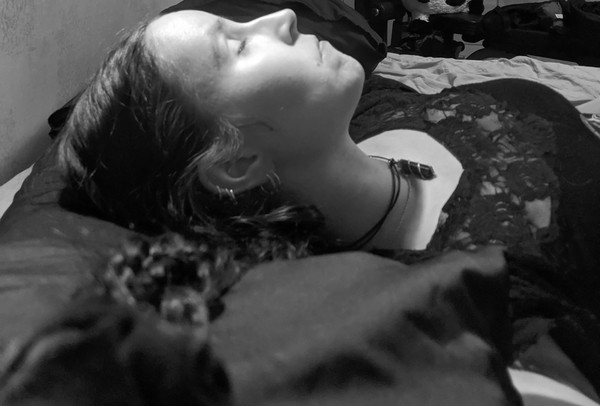
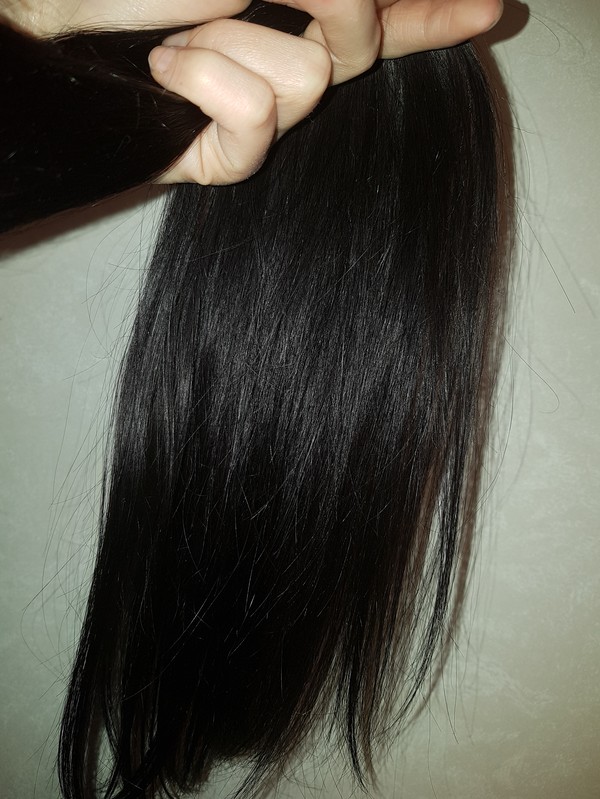
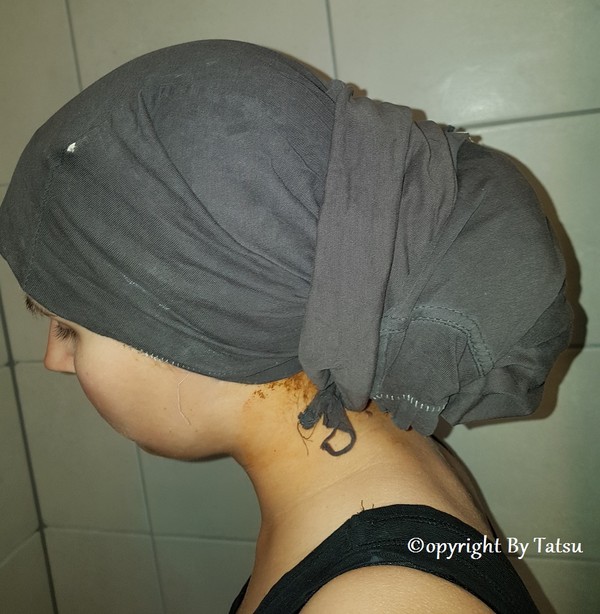
Succesful wash!
Does anyone remember or did anyone even reed my rant about going over from CO-washing to herbal washes?
Well, I've finally succeded! I've now done two succesfull washes and feel that I can share it.

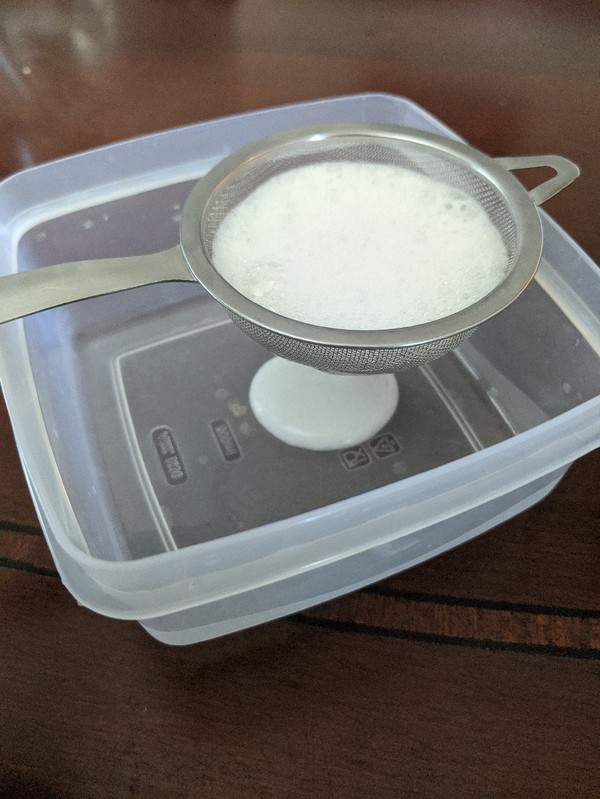
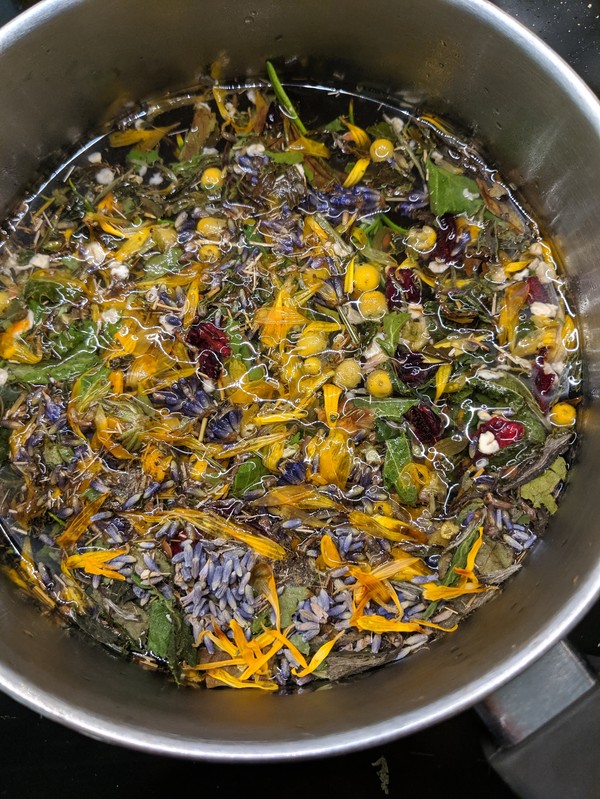
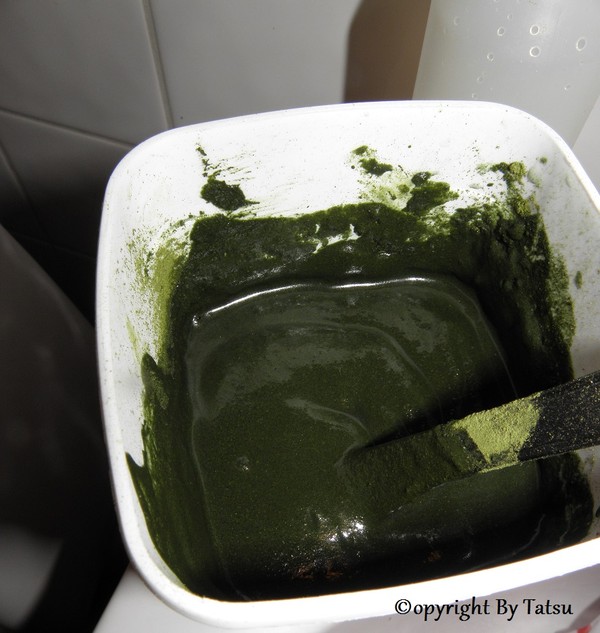
I used black fermented rice water and herbs. These are the same ingredients that I use in my hair masks and I still use it as a mask.
I will share the recepie in another post soon, but here's what I did.

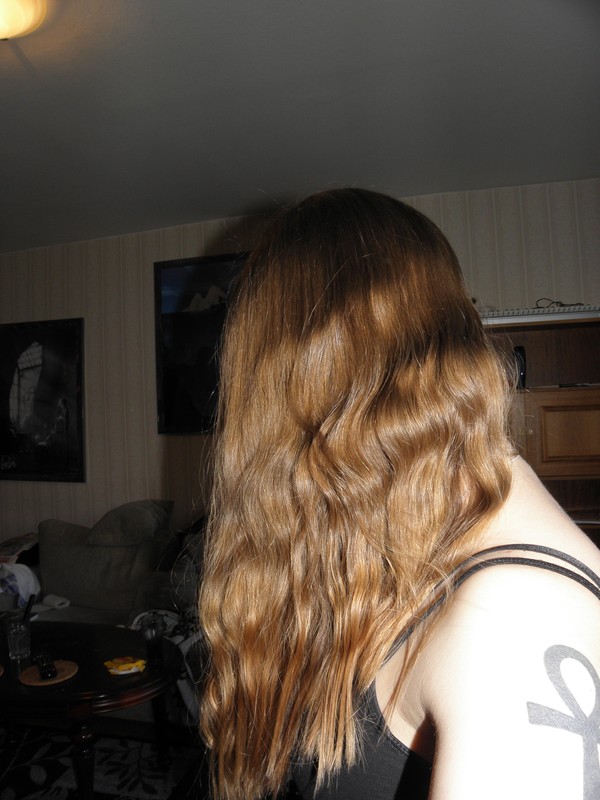
Oily hair before.
- I put the mask in my hair.
- Put on a shower cap and towel.

- Heated the sauna and took a sauna.
- Added some more of the hair mask and massaged the scalp.
- Rinsed it out with water while massaging the scalp more.
- Did a diluted apple cider vinegar rince.
- Towel dried my hair by gently squeezing out the water.
- Let it air dry
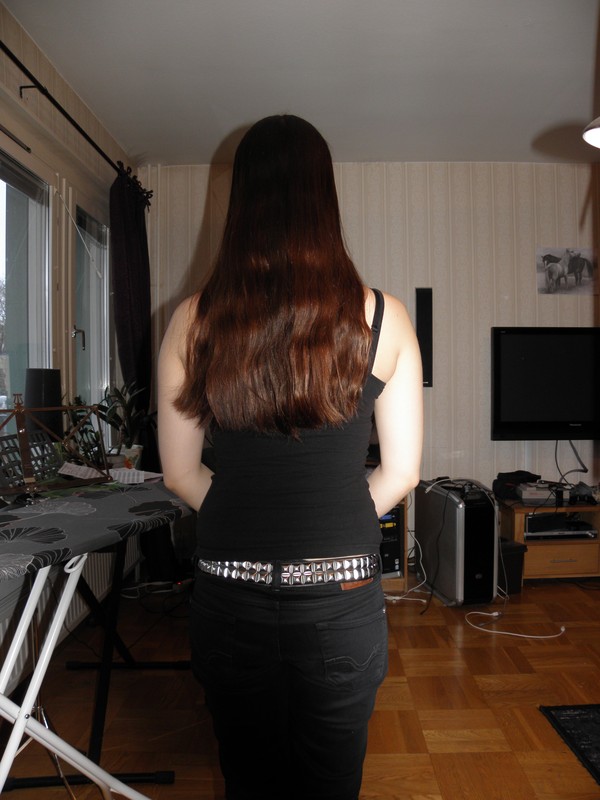
The result!
My hair got perfectly clean, but a little bit dry and static. So I sprayed some homemade detangling spray in it and added some oil. It's now clean, soft and silky!
I will continue with this method! But I will still do CO-washes after dying it with henna and indigo, to really get the indigo out of my hair.
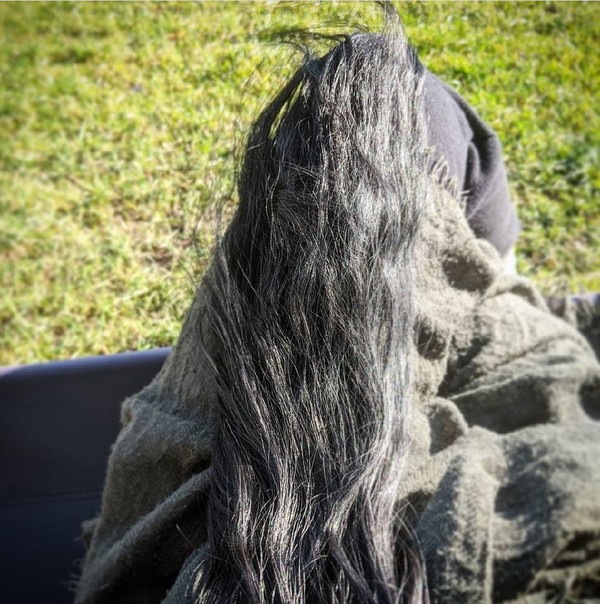
Hair and some stuff

It's very hot here lately. But at least it doesn't take six hours for my hair to dry.
Also, my hair used to be straight. What happened? It looks more like 1c or 2a lately...

I have several posts planned, but I've been busy. So here's something cute as compensation.

DIY. Make your own Aloe Vera gel
Aloe Vera is a great humectant. (Humectants helps to draw moisture into the hair and skin. Moisture is water and all moisturizers works like this.)
I've been making my own Aloe Vera gel for a long time and it's an important part of my hair care routine. I use the gel as it is, or in a detagnling spray.
You need:
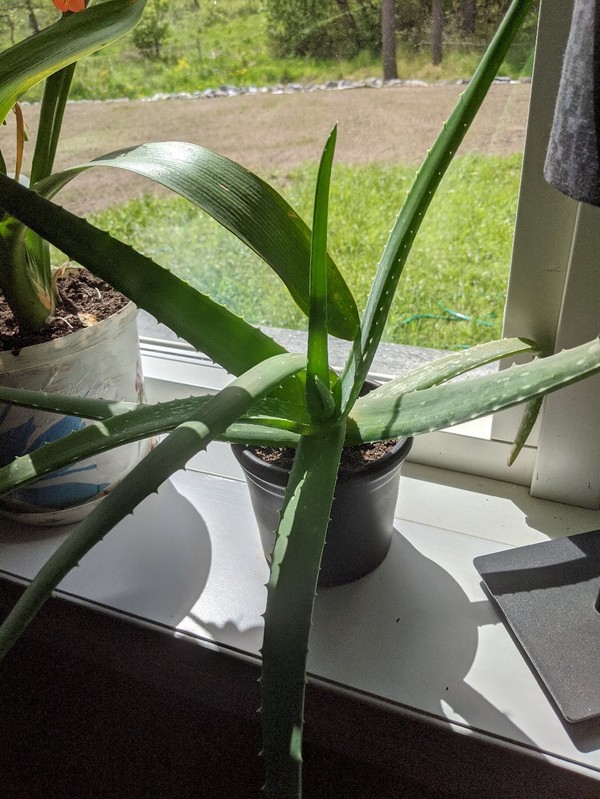
- One or a few Aloe Vera plants (aloe barbadensis. I have several, so I'm never running out of leaves)
- A potatoe peeler
- A teaspoon
- A blender
- Something to strain the gel with
- A jar or a bottle
- Optional: vinegar, distilled water, rose water
How to do it:
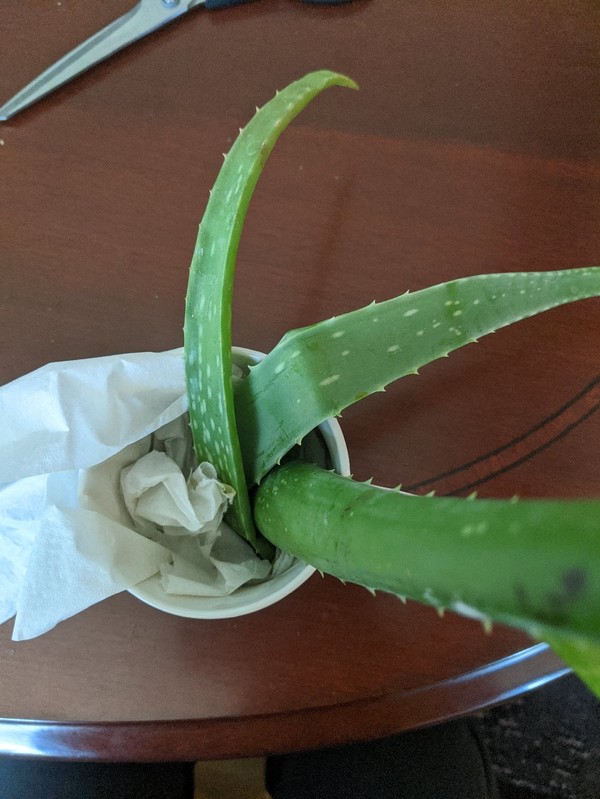
- Cut off a few leaves.
- Let them "stand" for a few minuters, to allow the "yellow liquid" to escape.

- Peel of the flat part of the leaves
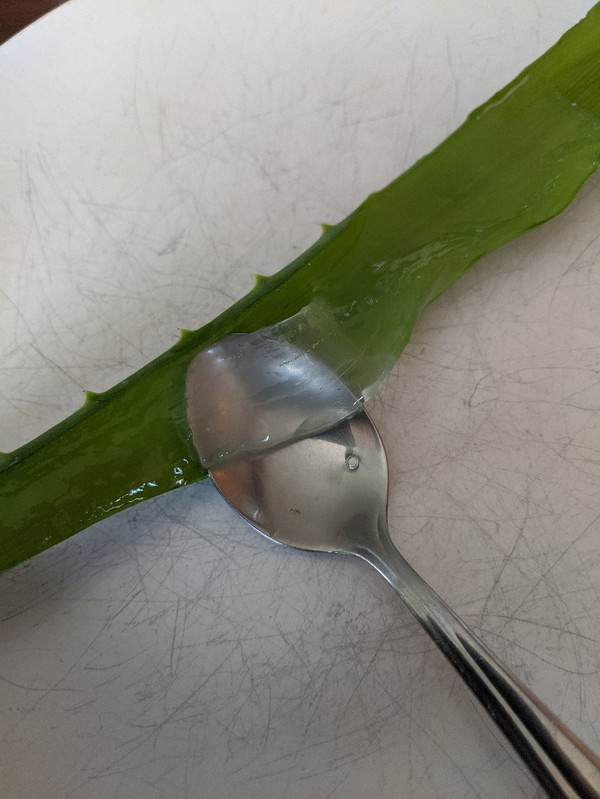
- Remove the "flesh" with a teaspoon
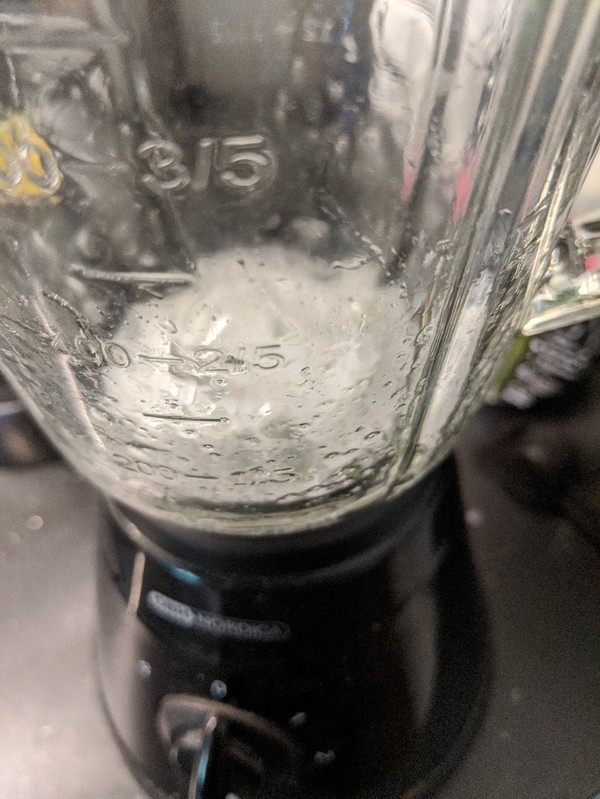
- Blend it
- You can add distilled water if you want more of a liquid, or rose water if you want it to smell nice
- For longer storage you can add a few drops of vinegar. (I like to add apple cider vinegar. It makes the gel stay fresh longer and is beneficial for both the hair and the skin.)
- Strain it to get rid of any chunks (the foam will disappear).
- Store it in the refridgerator
- It stays fresh for 1-2 months in the refridgerator
- Apply it with a spray bottle or with your hands to your hair, scalp or skin.
I use it to moisturize, add shine and slip to my hair, tame braid shread and to reduce tangles. I use it a few times a week followed up by an oil and around once a week to my scalp, by massaging it in.
DIY. Make your own hair friendly pillowcase
Silk and polyester satin pillowcases are a lot kinder to the hair than cotton, but they can be expensive and hard to find. Luckily it's not hard to make your own!
You need:
- Fabric in silk, polyester satin or some other slippery material
- Scissor
- Pen
- Needles
- Thread
- Sewing machine
- An old pillowcase
How to do it:

- Put an old pillowcase in the right size, on the fabric.
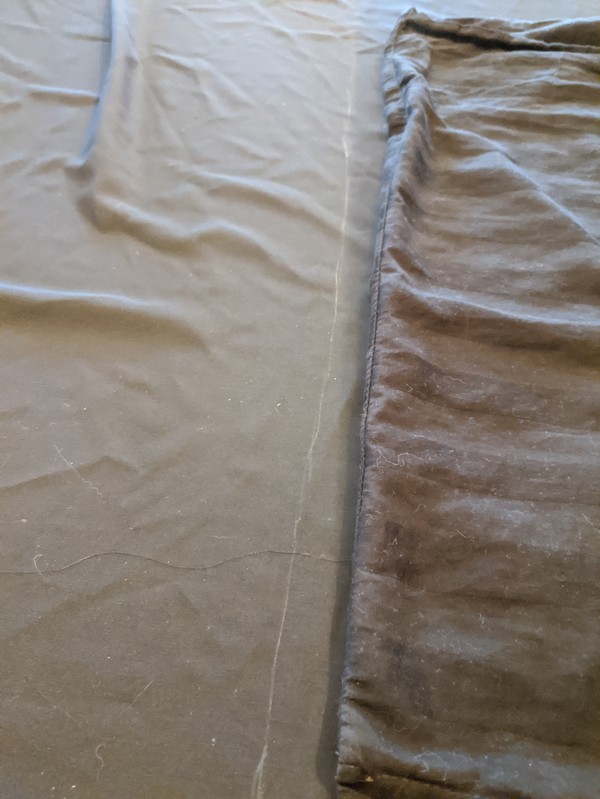
- Draw a line two cm outside the longer edge of the pillowcase.
- It's not the end of the world if the line isn't perfectly straight. As you can see, mine isn't.
- Put the pillowcase on top of where you just had it and continue your line.

- Add 20 cm for the pocket.
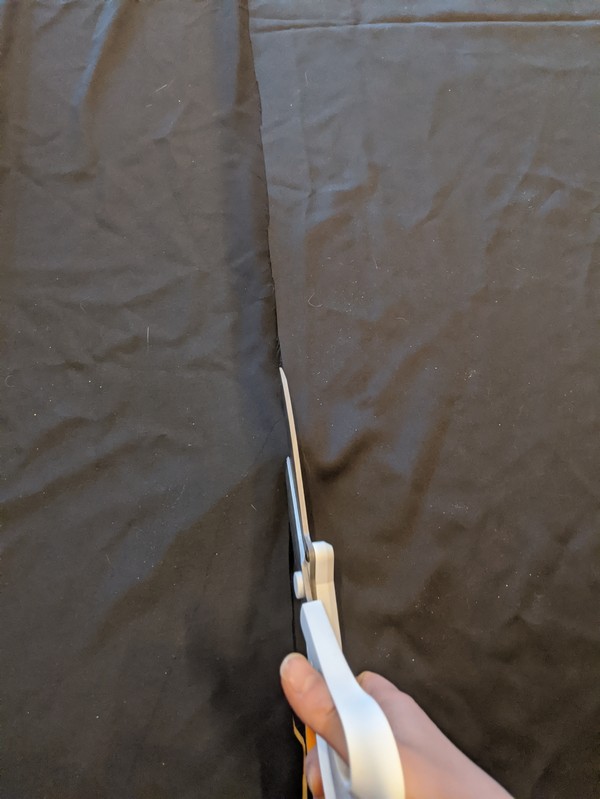
- Cut out the fabric.
- If you're making more than one pillowcase, just place the piece you just cut out, on top of the fabric and cut after it.

- Zigzag the shorter edges.
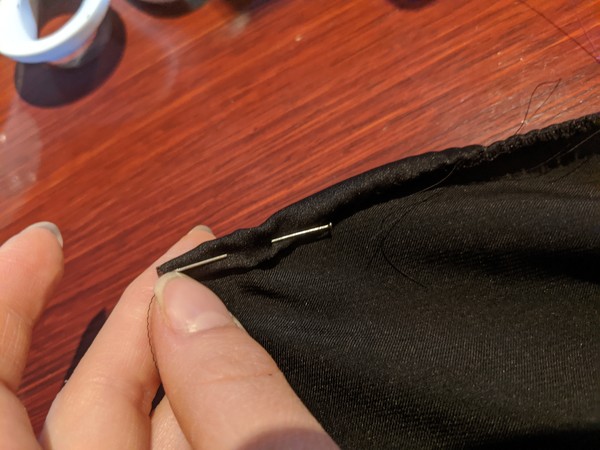
- Fold the shorter edges twice and pin them as seen in the picture.
- Sew a straight seem. (Both shorter edges)
- If this feels hard, you can fold once, pin, sew, fold again, pin and sew, instead of folding twice at once.

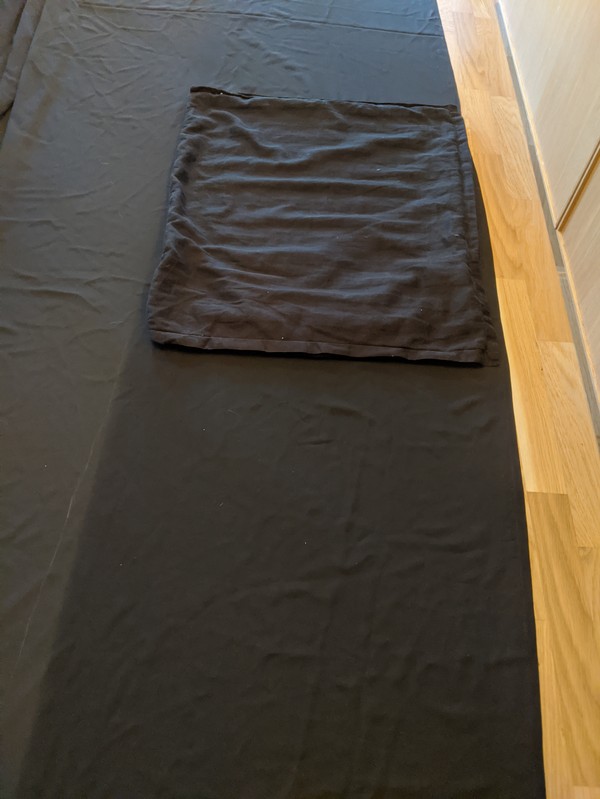
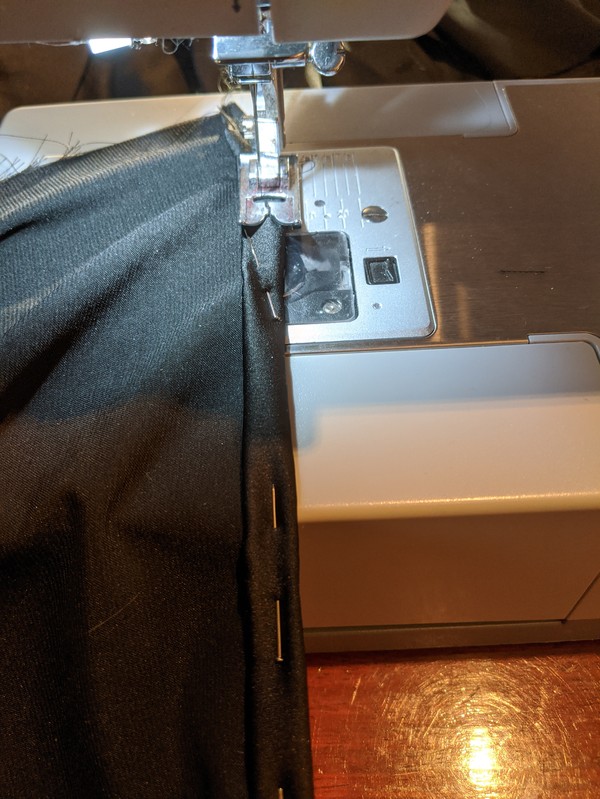
- Line your fabric up with the old pillowcase.
- Fold it inside out, so that the top part and the fold is even with the pillowcase.

- Put the fabric on top of the old pillowcase.
- Align the fabric with the pillowcase and make sure that it's "folded, inside out".
- Fold the remaining fabric as seen in the picture.
- Pin it, so that the top edges are perfectly aligned and the longer edges are "aligned enough".

- Zigzag along the longer edges.
- Sew a straight seam around 1 cm inside the zigzag seam.

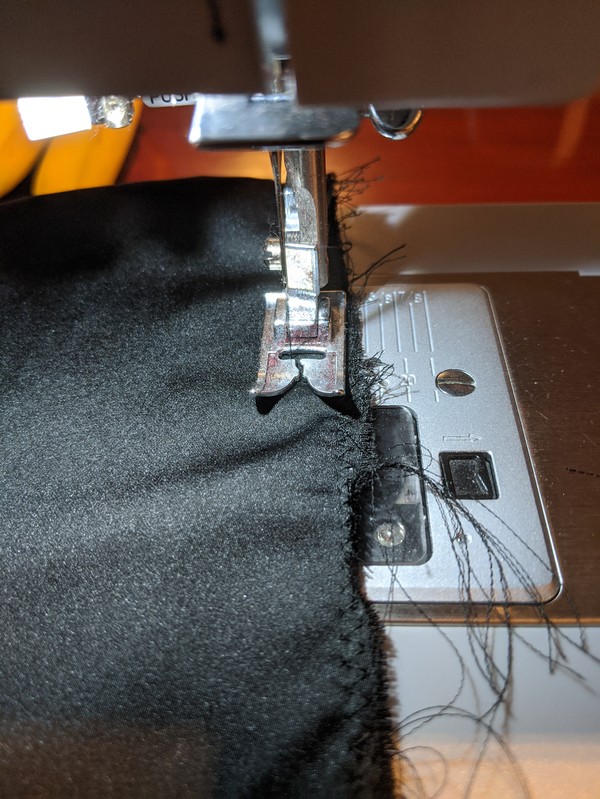
- Turn the pillowcase so that the outside is now outside.
- Now you have one or several hair friendly pillowcases!
- Go to sleep and enjoy waking up with less tangles and friction damage in your hair!
A warm February day
A normal year, we would have Snow. This year we don't... So I did some S&D in the sun today.

"Hair plans" for 2020-2021
Is anyone surprised that I've already made some plans for my hair, for the next two years? Probably not.
Here's a "short" summarize:
Length and trims
I'll trim a little on Wednesday. Maybe a tiny bit during the summer. But I'll keep this to a minimum until I reach knee. Hopefully by the end of 2020. I just want to get there as quick as possible...
I'll of course keep up the S&D (search and destroy).
After that I'll microtrim to thicken up my hemline. That means that I'll still be growing it longer, but I'll trim maybe half of the growth, every other month or so, until I'm once again happy with my hemline. I'm counting on this taking all of 2021. After that I'm back to trimming twice a year.
Washes
I'll continue my search for a new washing routine that works fo my hair and doesn't empty my wallet.
Updos
I'll continue to learn new updos and perhaps invent a few of my own. I especially want to try more historical updos.
I'll also try to variate my updos as much as possible.

Crafting
I'll make some more stuff for my hair. One thing high on the list is different types of snoods.
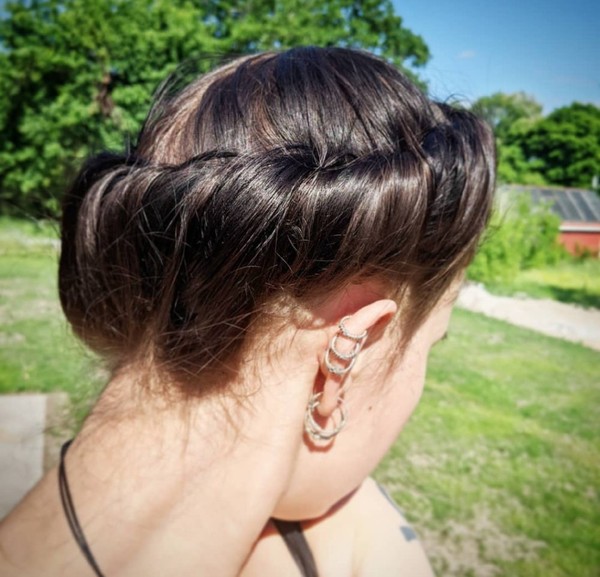
Hair drying and chores
While waiting for my hair to dry, I sometimes have to do stuff like laundry or eating. And since I don't want to completely stop the drying process, but also can't have my hair everywhere, or on the floor while leaning forward. I put it up like this, with a claw clip, and it ends up a lot shorter.


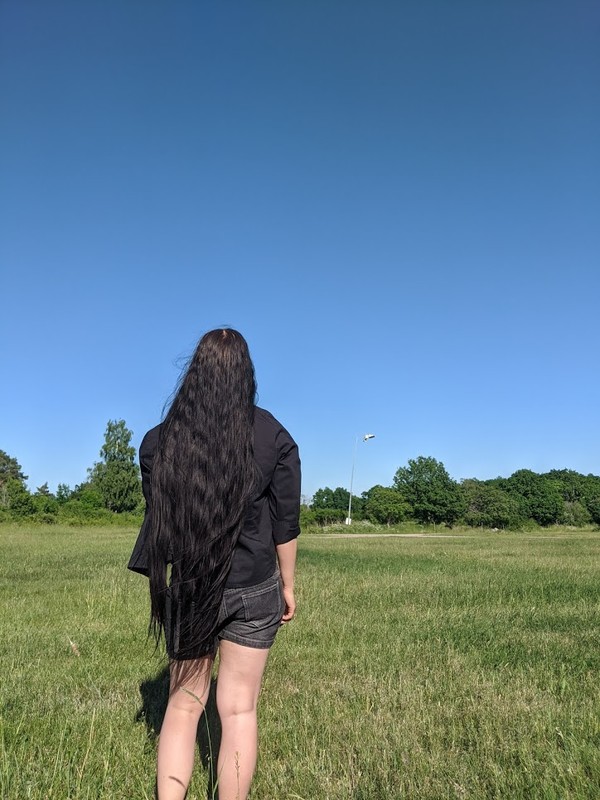
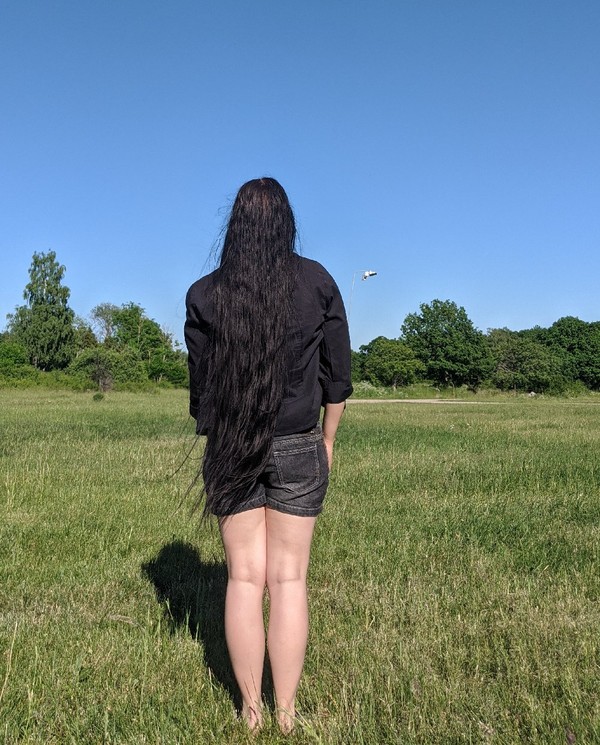
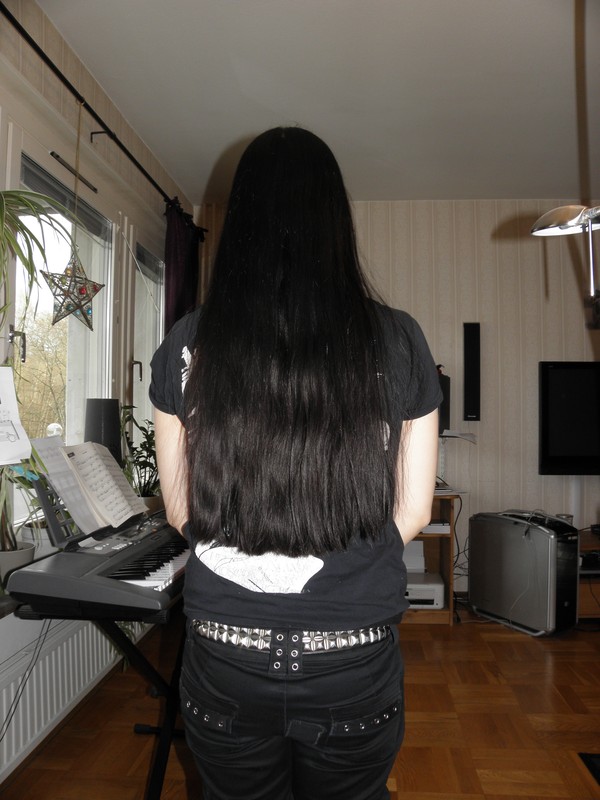
I don't know if it was how I washed my hair, but the indigo have been washed out a lot from my roots. This hasn't happened in years!
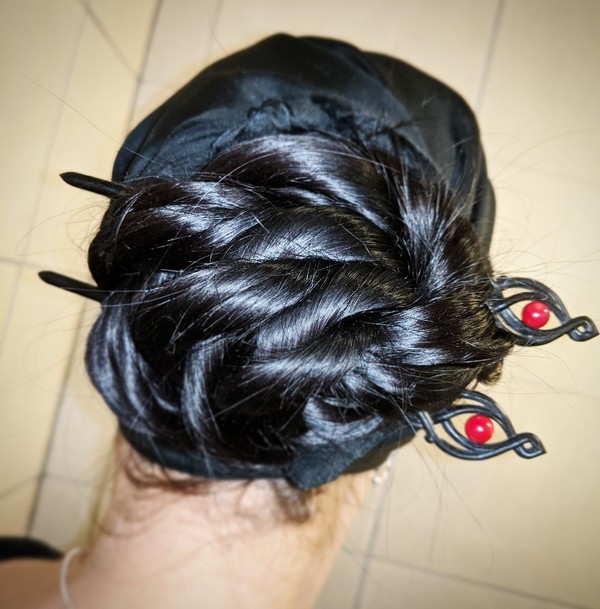
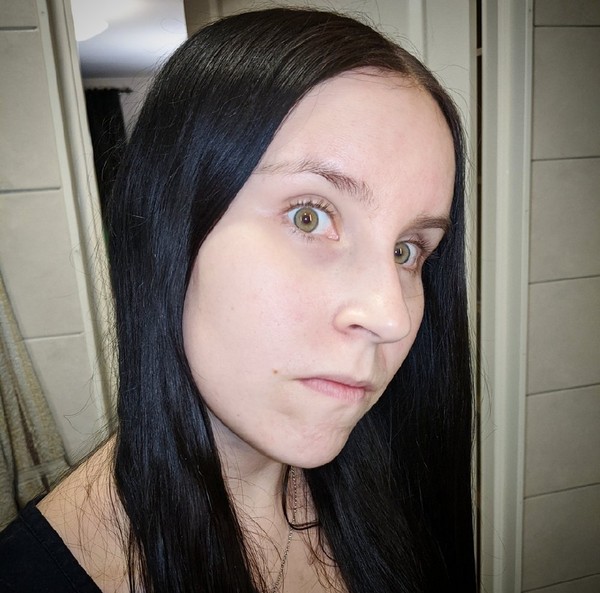
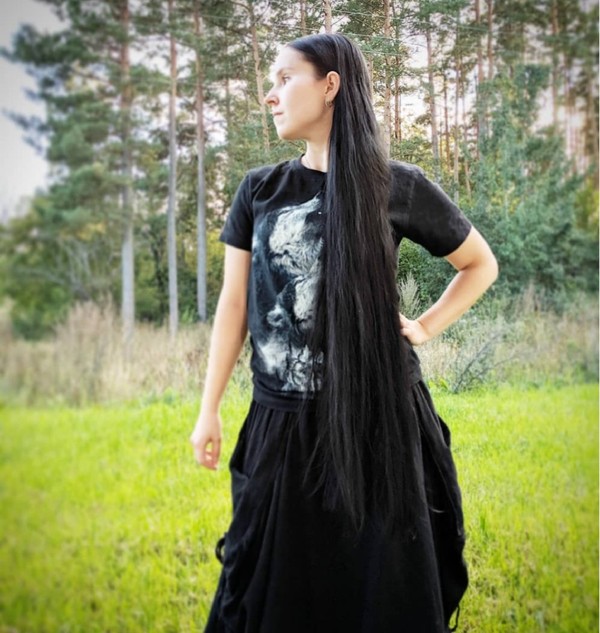
And here's just a picture of me and my almost det hair.
Time for a huge change
Sorry but this post is going to be long...
As some of you know, I've been a CO-washer (conditioner only), for 6,5 years. It has worked great for my hair and scalp. It's also been easy to wash my hair this way.
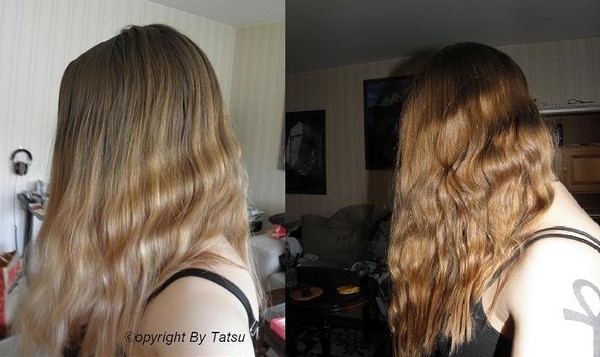
Before CO-washing and after one year of CO-washing.
But few are the condtiotioners that my hair have liked (less than five in my entire life and I'm 28) and I'm also picky when it comes to ingredients. The one that I've been using for many years is expensive and they've adjusted the prize even more. I've found another one that I like, but the prize and bottle size is the same. And obviously my hair has gotten longer over the years.
So while I only wash my hair once or twice a month, one bottle only lasts two washes and that ends up being a lot of money after all. A lot more than I'm willing to spend.

So I've been thinking...
I've written a lot about natural hair washing and conditioning on my hair forum, spent many, many hours reading about it and I've been making my own deep conditioner for years.
So what would be the most logic and economic thing for me to do? I do know which ingredients that works for cleaning hair and which that conditions it. I do know a lot about what works for my hair and not. I've actually tried a few things like washing with fermented rice water before. I do know even more now than I did back then.

So I'm now going to experiment, until I find the right balance between clean and conditioned hair, using natural ingredients, like home picked herbs and Indian powders.
It's back to experimenting and while it might take some time, I think that it's going to be worth it and while failing a few or several time, might be frustrating, I will also enjoy it! Because this is the type of thing that I find fun and interesting. (Remind me of this if I try to crawl back to expensive conditioners in six months!)

I'll probably buy one bottle of conditioner to use for Cristmas if I haven't succeded by then, since it is the one day of the year that I wear my hair loose.
Would you be interested in posts about my experiments? If so, tell me, because otherwise I probably won't write about it until "I'm done" and have settled into a new routine.
Book review - Heaven's Silhouette: Iyarri Chronicles Book 1
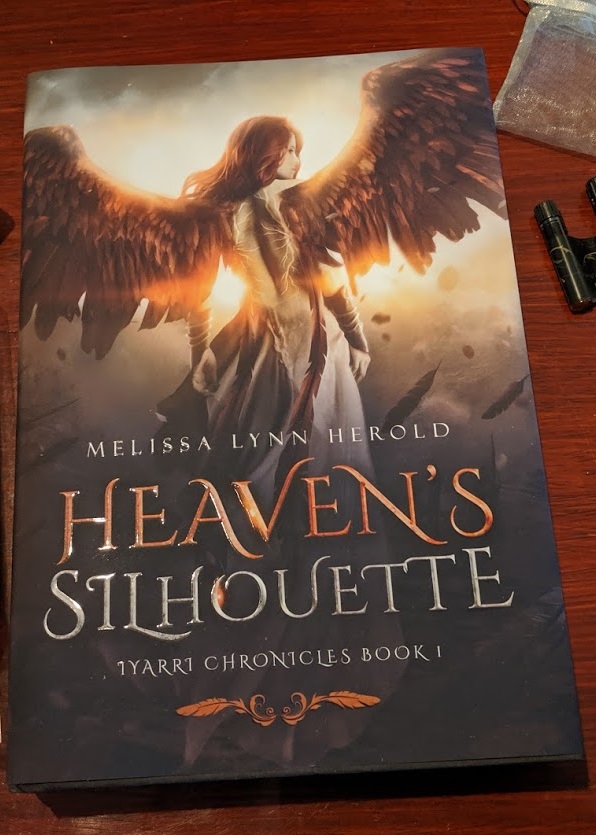
Summary
They aren't angels, despite their wings, but fearsome warriors. Yet Aurelia has something in common with them. Why is that and can she find it out without loosing her life?
I bought my ex from Etsy NightBlooming

What I think about the book
The book is written in such a way that you can really picture the world that Melissa has created. She brings even the little detail to life. The characters really comes through and you can follow them through joy and hardship while they evolve in a very believable way.
It is written in a way that gives the story depth and meaning. You never want to put it down!
The design is also beautiful and you can see the effort that Melissa puts into every little detail of all of her creations.
I can't wait for the next book and I highly recommend the first!
Extra
You can also get oils or misters that smells like the characters here. The oils smells lovely and personally, I love Melissas oils for my hair. The Aurelia oil is one of my favorite hair care products, both because my hair loves is and because of the amazing smell!
NightBlooming
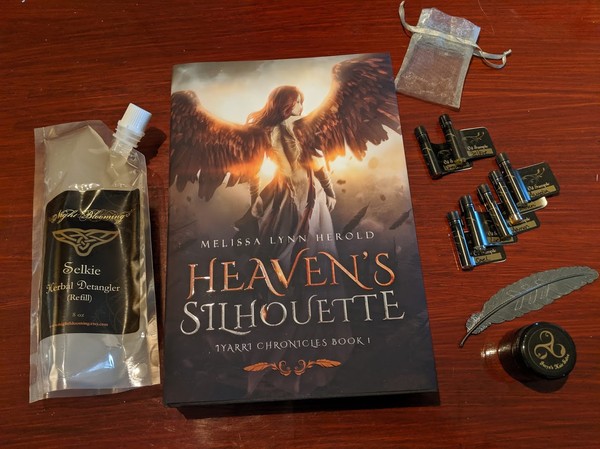
I recieved my package from NightBloming today. I've been so eager to get it!

The book is so beautiful! My pictures can't do it justice.
As a patreon to Melissa I got to choose the number and bookmark.

Five oil samples from her book and also selkie and dragons blood. How great isn't it to be able to read a book and to have oils, smelling like the characters?
The oils smells lovely and I can't decide which to try first!
You'll been given reviews of all the oils and the book here, when I've tried them all and read the book.
The salve and detangler are stuff that I've ordered before and love. I also have a full size of the Aurelia oil and it's one of my favorite hair products!
I'm truly addicted to NighBlooming and I'm thinking about making a post about all of the stuff that I've tried, somewhere in the future. Is this something that you would like to see?
My journey to black hair with henna and indigo
So here's the second part about henna and indigo. (First part here) This part is about my journey.
Here's my natural haircolor. Mars 2014.

August 2014
I used henna for a while, before starting the process of getting it black.
The first time I used indigo, I used the two step method, but since I couldn't find any good instructions, I had to experiment a bit on my own with time and how to mix it.
January 2015
After the first/first few applications, I got a reddish brown color.
One thing that I should mention here, is that I'm lazy. I mostly went a few months between applications, so the process would have been quicker, if I had done it more often.

Mars 2015
Mars 2015

November 2015
After a while, I got it black, but even without washing my hair, it faded to brown in a week.

Mars 2016
But I didn't give up. I continued to dye my hair with henna and indigo and it began to stay black longer. After a while I was able to do roots and not all of my hair everytime.
April 2016
Eventually I had to do full head applications only twice a year and now once. My hair doesn't fade much at all.

August 2017.
February 2019.
Roots september 2019.
So was it worth it, can I recommend it and how long will I keep this up?
It was and is worth it for me. I can have my favorite hair color without damaging my hair! Now I only do my roots every other to third month or so and a full head touch up once a year. So while it takes a full day, I still don't have to do it that often.
If anyone else are sure that they want black hair for a long time and are ready put in some time and effort, I do recommend it!
September 2019
I will continue to do this until my hair becomes grey. Not just a few hairs, but when it starts to truly become grey. Then I will grow out the grey and it will take years. But hey, I'm 28. My mother's soon 57 and still not grey and I think that I take after her, so I'll probably keep this up for many more years!
How to dye your hair black with henna and indigo
If you want you to, you can just skip to the instructions below...
One of the most frequently asked questions I get, is how do I dye my hair black with henna and indigo and how long it took before I got it black. So I figured that it was time for some newer posts about this.
I will divide it into two. This is the first part and I'll share how to dye your hair from the start and how to do your roots and hair later on.
In the next part I'll share my personal journey (with pictures,) to black hair with henna and indigo.

Warning!
Think it thorugh!
Are you sure that you want black hair for years to come? Because you can't bleach it. Your hair will turn green if you do!
It's messy and takes time. Are you in for a quick and really easy way to dye your hair, this isn't for you.
Instructions

You need
- Gloves
- Clothes your aren't afraid to stain
- Plastic or a shower cap
- A towel, hat, an old T-shirt, or something similar
- Preferably a claw clip
- Time
For the henna and indigo:
- A plastic container that you aren't afraid to stain
- A lid/plastic to cover it with
- Something to mix it with. I use a plastic fork
- Coconut milk
- Honey
- Oils
- Conditioner

Mix the henna
There are several ways to do it. You can just mix it and use it. You can use warm water or cold. You can add honey, oil or coconut oil and other things. Here's how I prefer to do it:
- If I use oils and honey I add them from the start. If I use coconut milk I do the same and change about half of the water for coconut milk.
- I mix a little bit of henna powder with a bit of warm water/coconut milk at a time. I add more and continue to do this until I have the amount that I want.
- When I have the amount that I want, I dilute it until it has the consistensy of thick yogurt. The thinner you make it the easier to apply, but more dripping and the other way around.
- I let it sit over night under a lid.
Before dying
- Remove everything you can from your bathroom.
- If you have plastic floor, cover it to avoid stains.
- If you have a washing machine, drawers or something else, cover them too.
Appication and rinsing
- Wear gloves
- You can chose to apply the henna on damp or dry hair. Since I only do roots with henna now, I prefer dry hair.
- If I do a full head application, I find it easier to just use my hands. If I only touch up my roots, I prefer an application bottle.
- Start at the back of your head. Put the rest of the hair up. Apply the henna to your roots or all of the strand. Carefully massage it in, without tangling the hair. Henna is quite easy to spread evenly.
- Take another strand and continue throught all your hair/roots. Work from tha back up and forward.
- Cover your hair with a plastic bag, plastic foil or a shower cap.
- Put on a towel, an old T-shirt or something else to keep it warm. It helps the dye. You can also sauna.
- Leave on for at least 3 hour. I leave it for 3-5, but you can do it over night if you want to.
- Rinse with water. If you only do roots, your can put your length in a plastic bag and seal it with elastics. And only rinse your scalp.
- Towel dry
Mixing the indigo
You want to ues the indigo at once, so that it won't loose it's effect.
- Use warm, but not hot water.
- Mix a little bit of indigo with a little bit of water/coconut milk and then some more. Not all at once or you will get lumps. You can add a bit of oil or coconut milk, but less than with the henna, since the indigo is more sencitive.
- Continue until you have the amount that you want to. You will need more indigo than you needed henna.
- Dilute until you have the right consistensy. Thin to thick yougurt. Thinner makes it easier to apply and to get an even result, but it will drip more.

Application
- Do the same thing that you did with the henna, but take smaller strands, since it's a bit harder to apply evenly.
- Cover the same way as you did with the henna
- Leave for 1-2 hours. This is when I heat up and step into the sauna.
- Rinse with water
- Wash your hair as usual
What I use to comb and brush my hair

First I use a wide toothed wooden comb and my fingers to detangle my hair.

Then I follow up with my boar bristle brush. Sometimes I also use the top one to spread oil or sebum in my hair, or the middle one to smoothen my hair a bit extra.
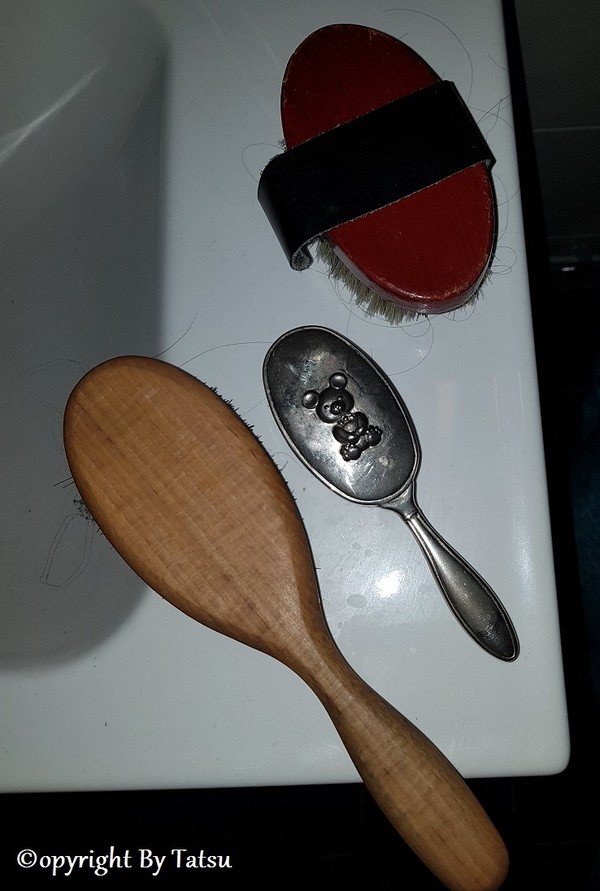
just as the bottom comb in the first picture.
The brush in the middle I got with a comb (that I use to clean my brushes now), when I was baptised or something like that. I found it at my fathers attic one and a half year ago, and decided to use it again. I don't know what the bristles are made of.
The top one I got many years ago for brushing our foal (it was my first horse brush), that later became my horse. When I could no longer keep my horses I decided to keep the brush as it was nostalgic to me. I cleaned it and after I year or so, I realized that I could use it for my own hair. I don't know what the bristles are made of.
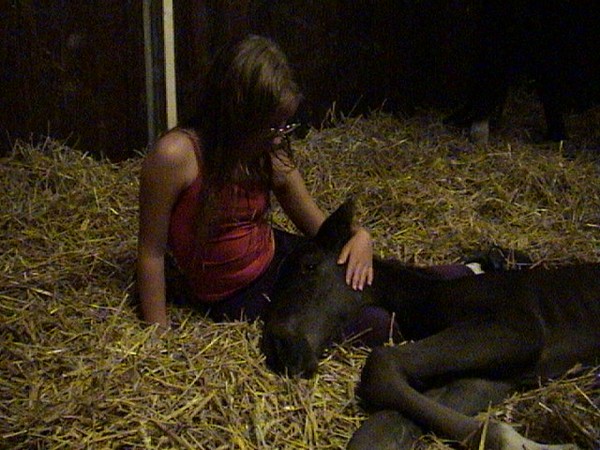
I still miss my horse...

It was also in the stable that I learned most of what I know about braiding. My horse had a lace braid in the picture (and a french braid in his tail).
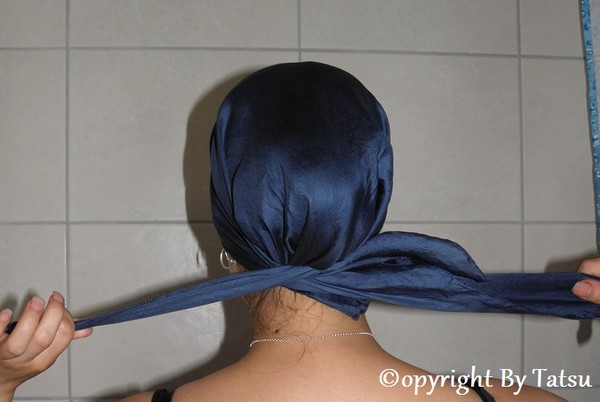
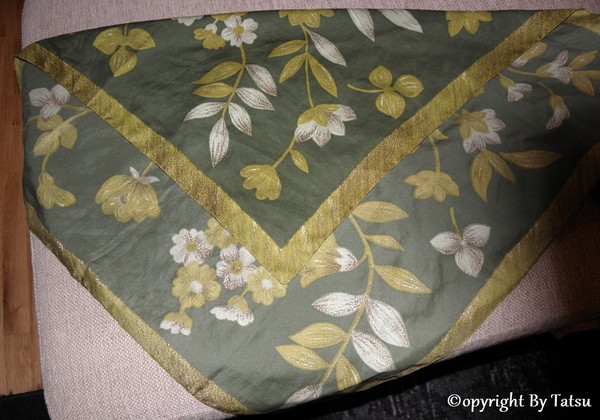
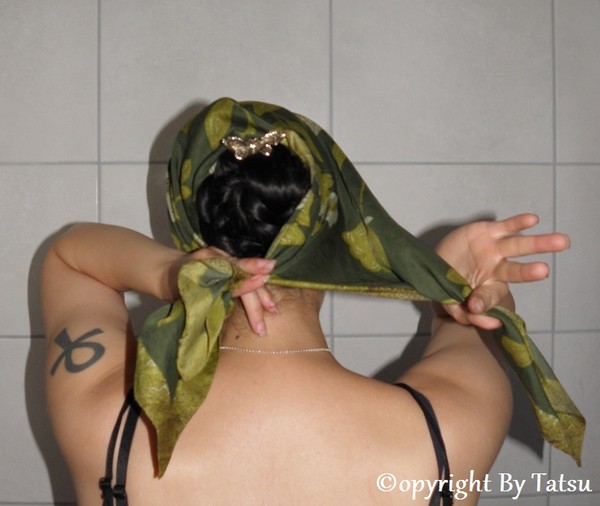
How to use a square scarf for you hair
The first version is great for protecting your hair, or to simply hide the fact that you haven't washed or brushed it.

Fold it like this.
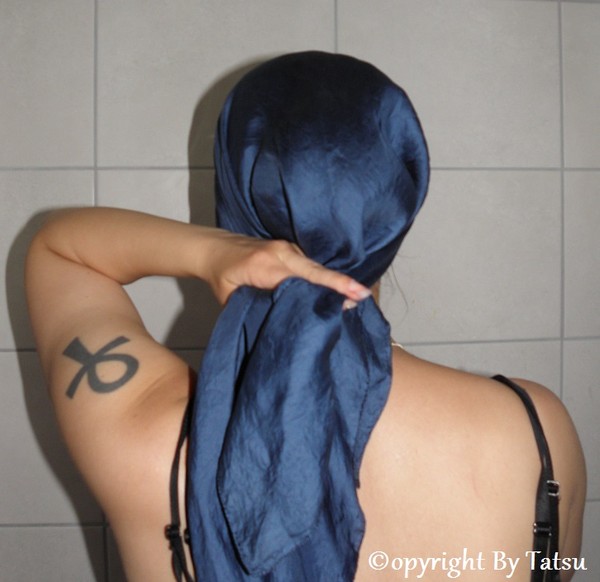
Put the "middle piece" over your bun.
Cross the "side pieces" over the middle piece.

Twist the middle section with one of the side sections.
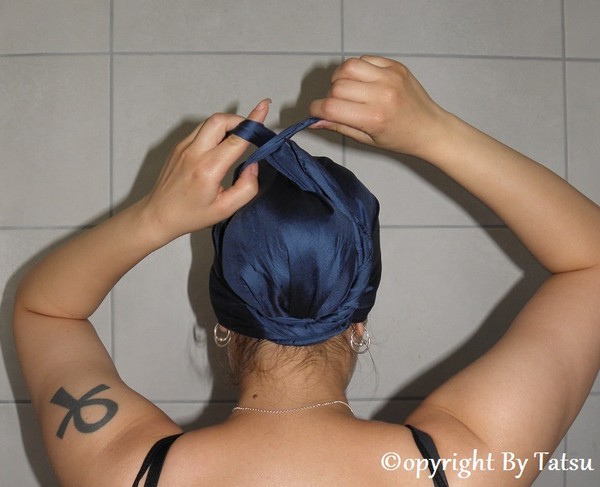
Put all of the pieces on top of your bun.

Tie it. You can now choose to leave the ends loose or tuck them in under your scarf.
Version number is great for hiding greasy roots or protecting the scalp while still showing of your bun and/or hairtoys.
Fold the scarf the same way.
Put the middlesection "on the side" of your bun.
Cross the side sections under your bun and twist the middle section with one of the side sections.
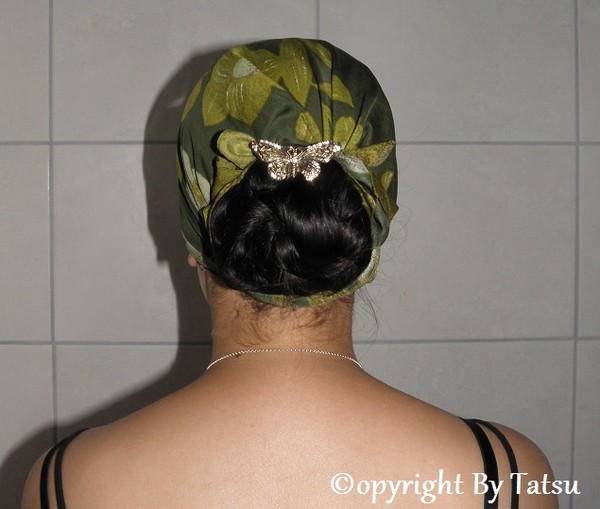
Tie it above your bun.
I might do a video to show and explain everything some day... But this is it for now and I really wear both of these styles a lot.
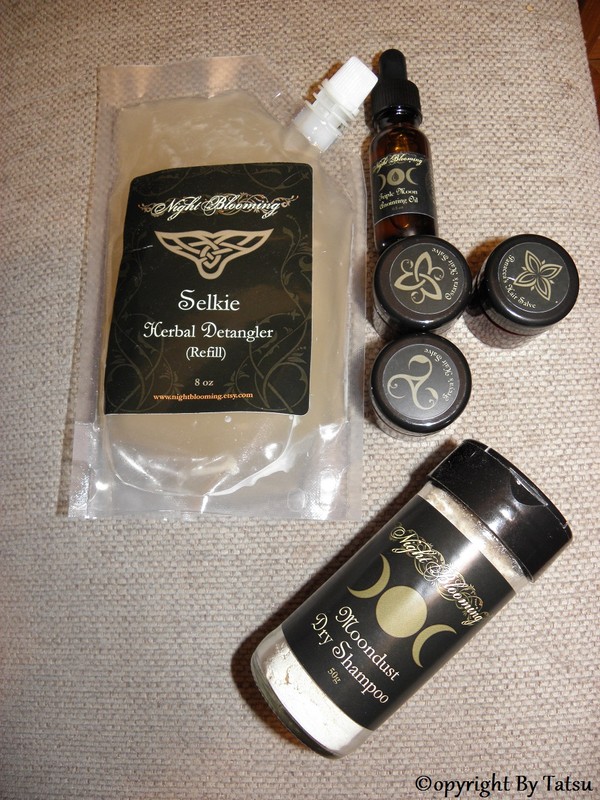
Some more stuff from Night Blooming
Life has been hectic, so I still haven't wrote a review of my last purchase from Night Blooming and now I've bought some more stuff. I'll write about everything after testing it properly and have the time and energy. Probably after we've moved.
Livet har varit hektistk, så jag har fortfarande inte skrivit om mitt senaste inköp från Night Blooming och nu har jag beställt lite mer grejer. Jag ska skriva om allt efter att jag har testat det ordenligt och har tid och energi. Antagligen efter att vi har flyttat.